Enablement and Configuration of GL Exports
The GL Exports feature enables you to export General Ledger (GL) files from Nimble AMS, using a single enhanced package which supports all three file formats (.csv, .txt, and .iif). This feature also provides you with pre-configured options for setting up GL exports to most commonly used GL systems.
To set up GL Exports for specific GL Systems or file formats like .csv, .txt and .iif, go to the recipe for the same.
To export the financial transactions created in Nimble AMS in the required GL file format:
Create a batch export configuration record. The Apex class value selected in the Export Generator field controls the file format.
Then, on each entity, you set the Batch Export Configuration that will be used to export GL files of that entity.
Deploy the fields and field sets from the GL Export Setup tab. Or, create your own field sets on Transaction and Batch objects.
Finally, create or update GL Export Setting CMT record with the required details.
For details, refer to the below sections!
Prerequisites
Please contact support to learn more about how to set up GL Exports.
Configuration
1. Add/Update Batch Export Configuration Record
Make sure a Batch Export Configuration record is created or updated by selecting an apex class in the Export Generator field. To create a Batch Export Configuration, follow the steps given on Create a Batch Export Configuration.
2. Add Entity
On each entity, set the Batch Export Configuration that will be used to export the transactions of that entity.
To do this, follow the steps given below:
In the tab bar, click App Launcher, or in Salesforce Classic, click Nimble AMS, Staff View, Button, All Tabs.
Click Entities.
Select a list view—like All Entities.
Select one Entity for which you need to link the Batch Export Configuration record.
Make sure the appropriate Batch Export Configuration is linked to the entity. If not, update it and save the entity record.
Repeat the process for each entity, for which you need to export GL files.
3. Deploy/Create Field Sets
For ease and quicker set up, you can deploy the fields and field sets pre-created by us, for the following GL systems:
Sage Intacct
QuickBooks Online
QuickBooks Desktop
Microsoft Dynamics Great Plains
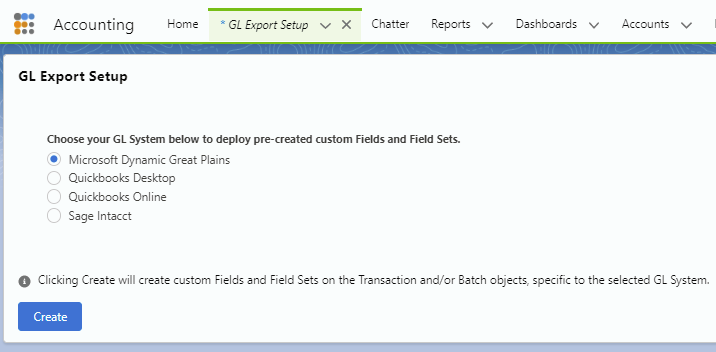
To deploy the pre-created fields & field sets on the Transaction & Batch object, follow the below steps:
In the tab bar, click App Launcher, or in Salesforce Classic, click Nimble AMS, Staff View, Button, All Tabs.
Click GL Export Setup.
Select the radio button against your GL System.
Click Create.
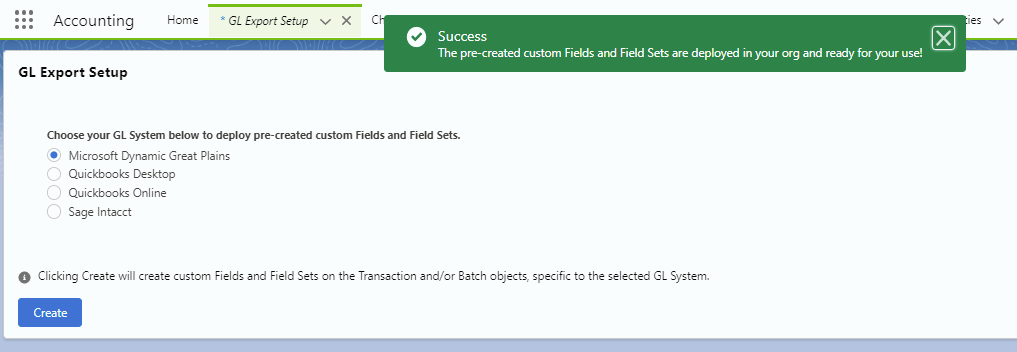
Wait for the success message.
Batch Object - Header GL file Field Sets
Transaction Object - Detail GL file Field Sets
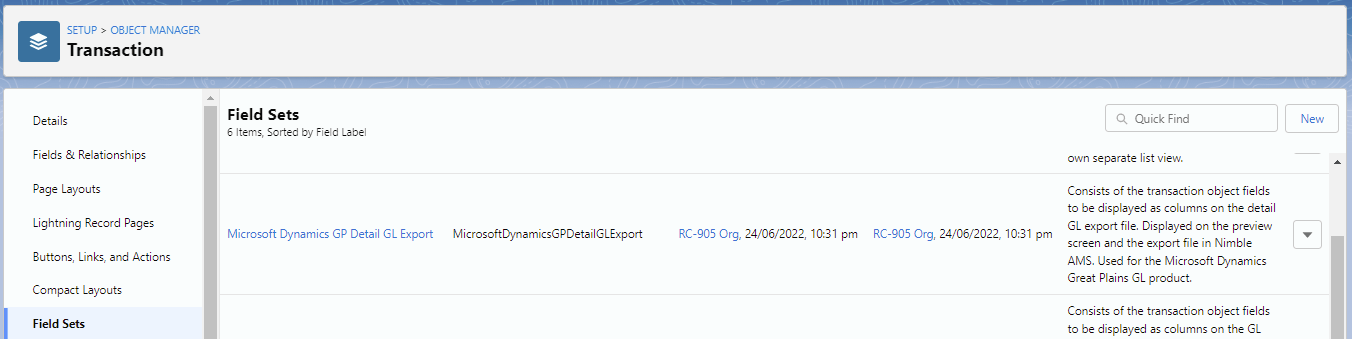
Where to find the deployed fields and field sets?
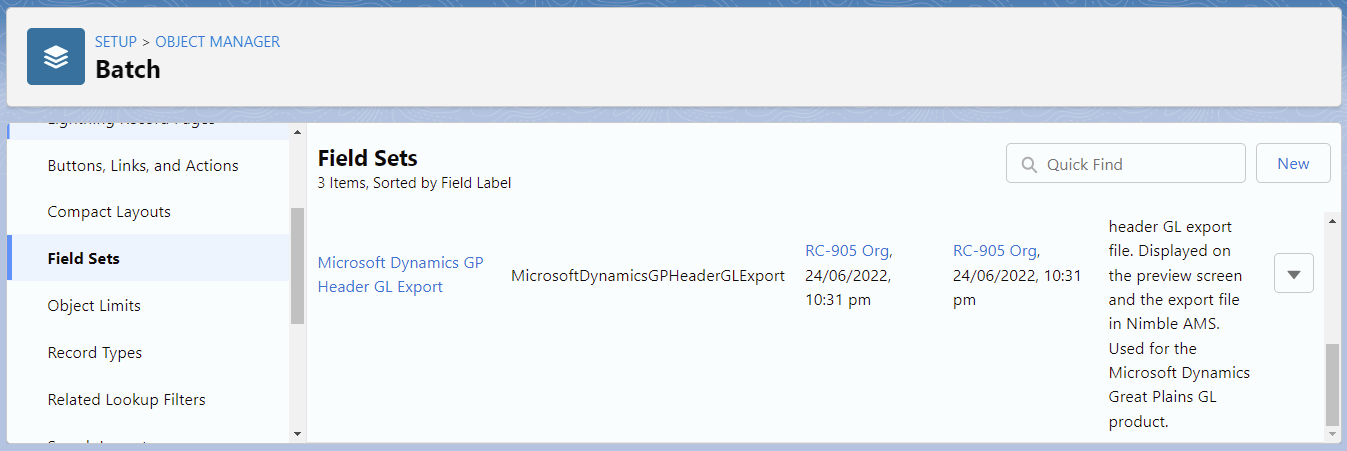
The pre-created custom fields and the custom field set can be found under the Transaction & Batch object.
Field Set name deployed on the Batch object: Microsoft Dynamics GP Header GL Export
Field Set name deployed on the Transaction object: Microsoft Dynamics GP Detail GL Export
The pre-created custom fields are editable and the labels/formulas can be modified based on the your needs.
We can add or remove the fields from the pre-created field set based on the your needs.
If not using the pre-created fields & field sets, you can create your own. To do this:
You need to create custom field sets on the Batch and Transaction objects.
Field Set created on the Batch object will be used as the Header GL file for this GL System.
Field Set created on the Transaction object will be used as the Detail GL file for this GL System.
Create new custom fields and use them in the field set, or the fields present in your org (stock product fields), or a combination of both.
It would be rare that no new custom fields would be needed for the GL export. Create all the fields that don't already exist that you will need to include on the GL export.
For Microsoft Dynamics GP, you will require two field sets:
Batch object field set: Header file contains columns that correspond to this field set.
Transaction object field set: Detail file contains columns that correspond to this field set.
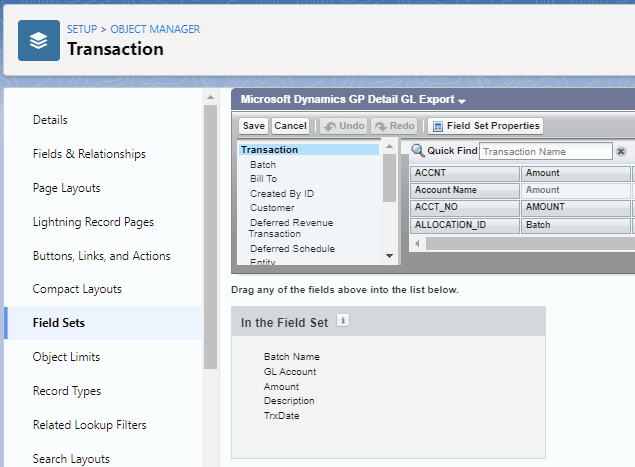
To create the field sets, follow the steps given below:
From Setup, in the Quick Find Box, enter Object Manager.
Select Transaction from the list.
From the left navigation menu, select Field Sets.
Click New.
Drag and drop the required fields on the field set.
Click Save.
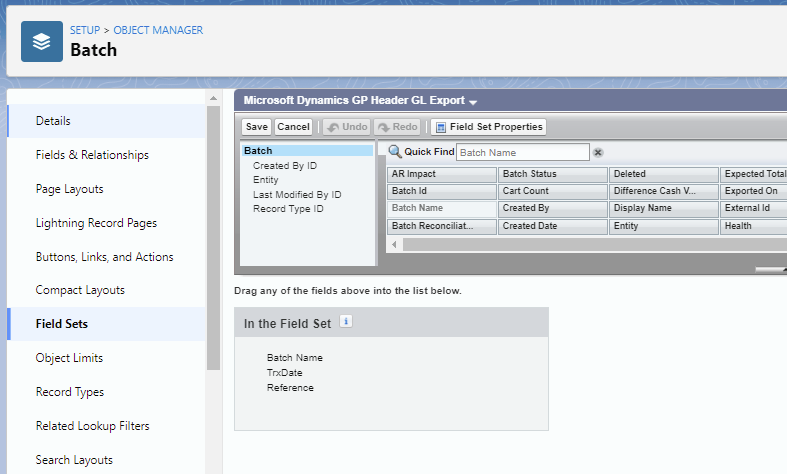
If using Microsoft Dynamics GP as the GL System, perform the following steps:
From Setup, go to Object Manager and select Batch from the list.
From the left navigation menu, select Field Sets.
Click New.
Drag and drop the required fields on the field set.
Click Save.
Repeat the steps 7-11 for Transaction object.
4. Update/Create GL Export Setting CMT Record
By updating/creating the GL Export Setting Custom Metadata Type record with the required field set, you can customize the fields displayed on exported Header and Detail files. You will see these fields on the preview screen while exporting the batch.
To do this, follow the steps given below:
From Setup, enter Custom Metadata Types in the Quick Find box, then select Custom Metadata Types.
Click Manage Records next to GL Export Setting.
Click New.
Enter the Label of the GL Export Setting.
Hit Tab key to populate GL Export Setting Name.
If using Microsoft Dynamics GP, in Batch Field Set Name, enter the API name of the Batch field set created earlier. If using any other GL system, leave this as blank.
In Fields to Group By, enter a comma-separated list of specific field’s API names to be used for grouping the transactions in the GL Export file. If this contains a value, GL file will be in summary format; if blank, GL file will be in detail format.
In Fields to Order By, enter a comma separated list of specific field’s API names to be used for sorting the transactions in the GL Export file.
In Transaction Field Set Name, enter the API name of the Transaction field set created earlier.
Select the Use Header check box to display the header (column names or field labels) in the GL Export file.
Click Save.
5. For .csv, optionally, update GL Export Custom Field CMT
If there is to be custom logic within the GL export, it can be included by configuring the GL Export Custom Field custom metadata type. Details on the fields within the GL Export Custom Field CMT are listed below.
Field | Value |
|---|---|
Label | Meaningful name for this configuration record. |
GL Export Custom Field Name | API name of this configuration record. |
Class Name | The name of the class that will do the logic that populates this field. See Class Names in Table 2. |
Context | Any additional data the custom field may need to do its job. Not required by every field. Required for the following Class Names:
|
Field Name | The name of the field to wrap with the logic. Contains the API name of the field to use to override the format of the GL Export. The overriding action will be based on the ClassName assigned to the CMT record. This field is required for the following Class Names: TrailingEmptyCellCustomField
|
GL Export Custom Field CMT
| |
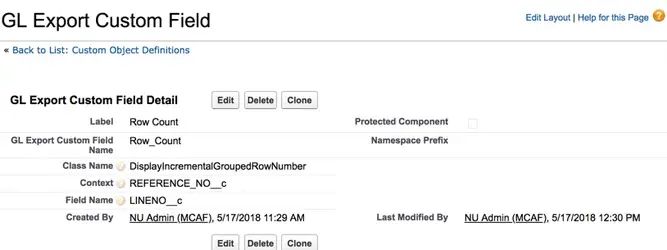
Table 1: GL Export Custom Field CMT
Class Names used under the Export Custom Field CMT
These are custom Apex Classes that are installed along with the GL Exports package to modify the format of the GL Export that is generated. These values are used when creating CMT records for the GL Export package.
Apex Class | Purpose |
|---|---|
TrailingEmptyCellCustomField | Adds a number of empty cells/columns after this cell equal to the number in the context field. ie context = 3 Note: When using this class, the Field Name field in the CMT must be populated. |
RowCountGlExportCustomField | Counts the total number of rows in the Export. |
DisplayPositiveDebitCreditValues | Adds all credits and debits within group |
DisplayIncrementalGroupedRowNumber | Counts the number of rows within a group. ie: 1, 2, 3, 4, 5, etc. |
DisplayFirstGroupedRowValue | Only displays the full row/columns of detail for the first row in a group. Groups are set via the "Fields to Group By" |
Table 2: Class Names
You should now be able to control the format of the GL file to be exported and the columns that are displayed on the GL file using the fields that are part of the field sets. You can also sort and group data as required.
And you’re ready to go!