Nimble AMS Volunteer Management allows your association to create and publish volunteer opportunities directly in the Member Portal. Members can browse open opportunities, view available jobs and shifts, and submit applications without leaving the portal.
Setting Up a Volunteer Opportunity
A Volunteer Opportunity is the top-level record. It represents the event, program, or initiative members are volunteering for. All jobs and shifts are created under a single opportunity.
To create a Volunteer Opportunity:
-
In Nimble AMS Staff View, navigate to the Volunteer Management app, then select the Volunteer Opportunities tab.
-
Click New.
-
Complete the following fields:
-
Volunteer Opportunity Name — A clear, descriptive name visible to members in the portal.
-
Description — Member-facing summary of the program, including purpose and any requirements.
-
Start Date / End Date — The date range for the opportunity.
-
Status — Set to Open to publish the opportunity. Options are Open, Closed, and Cancelled.
-
Web Product Image URL — URL of the logo or image displayed to members in the portal.
-
-
Click Save.
The opportunity will not be visible in the Member Portal until Status is set to Open.
Configuring Volunteer Jobs
Jobs define the specific roles or tasks within an opportunity. A single opportunity can have multiple jobs — for example, an Annual Conference opportunity might include Registration Desk, Session Room Monitor, and A/V Support.
To add a Job to an Opportunity:
-
From the Volunteer Opportunity record, scroll to the Volunteer Jobs related list.
-
Click New.
-
Complete the following fields:
-
Volunteer Job Name — The role name displayed to members. Be descriptive: “Registration Desk Volunteer” rather than “Job 1.”
-
Start Date / End Date — The date range for this specific role.
-
Location — Where this job takes place.
-
Self Service Enabled — Check this box to display the job to members in the portal. Jobs with this unchecked are staff-only and will not appear to members.
-
-
Click Save. Repeat for each role within the opportunity.
Configuring Shifts
Shifts are optional. When added to a job, members selecting that job during the application process will be prompted to choose a shift. If no shifts exist on a job, members apply to the job directly.
To add Shifts to a Job:
-
From the Volunteer Job record, scroll to the Volunteer Shifts related list.
-
Click New.
-
Complete the following fields:
-
Volunteer Shift Name — Include the time in the name for clarity: “Registration — Morning (7:00–9:00 AM).”
-
Start Date / End Date — The specific time block for this shift.
-
Max Participants — The volunteer cap for this slot.
-
-
Click Save. Repeat for each time slot.
The Member Experience
Once an opportunity has a Status of Open, it is visible in the Member Portal.
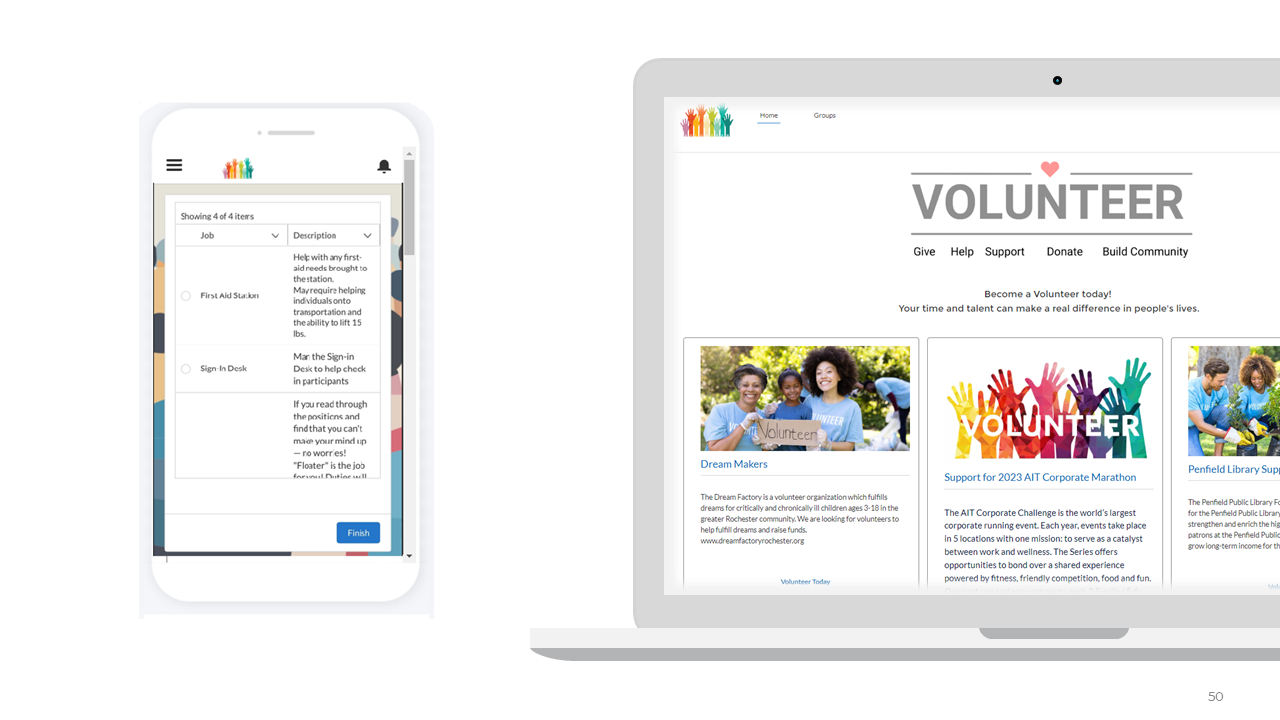
Browsing Opportunities
Members log into the Member Portal and navigate to the Volunteer section. They will see a list of open opportunities showing the name, dates, and description. Clicking an opportunity opens the detail view where available jobs are listed.
Applying for a Job or Shift
-
Member selects a job they are interested in.
-
If the job has shifts, the member is prompted to select their preferred time slot.
-
Member clicks Apply.
-
A confirmation is displayed. The application is recorded and immediately visible to staff with a status of In Review.
Managing Applications
Staff can review and manage all applications from the Volunteer Applications tab in Staff View, or via the related list on any Opportunity, Job, or Shift record.
Application statuses:
-
In Review — Submitted by the member, awaiting staff action.
-
Approved — Member is confirmed for the role.
-
Rejected — Application was not approved.