This page provides guidelines for enabling and configuring the Nimble Intelligence, including step-by-step setup instructions and key configuration options to ensure optimal performance.
Prerequisites
Before getting started, verify that you have the following in place:
-
CRM Analytics is enabled in the Org
-
Setup –> Analytics –> Getting Started
-
-
CRM Analytics Plus Licenses
-
Allocation of the Analytics (Plus) licenses to the relevant users.
-
Each user who needs access to advanced analytics features (For Example: dataflows, recipes, and AI-driven insights) must have the correct license and permission set.
-
-
Data Visibility
-
Ensure that object-level and field-level security settings allow the data needed for analytics.
-
-
Nimble Intelligence App
-
Nimble AMS has installed the Nimble Intelligence App, which is visible in Analytics Studio.
-
Enablement
Provisioning the Licenses
-
Click on Setup (gear icon) from the top-right of the page.
-
Enter
Company Informationin the Quick Find box and click on it. -
Verify CRM Analytics Plus appears under the “Permission Set Licenses” section.
-
Select the License and use the “Assign Users” button to allocate them to users as needed.
-
Click Save.
Assigning Permission Sets
Assign the CRM Analytics Plus permission set to each user requiring access to advanced analytics features.
Share the App to Give Access to Licensed Users
-
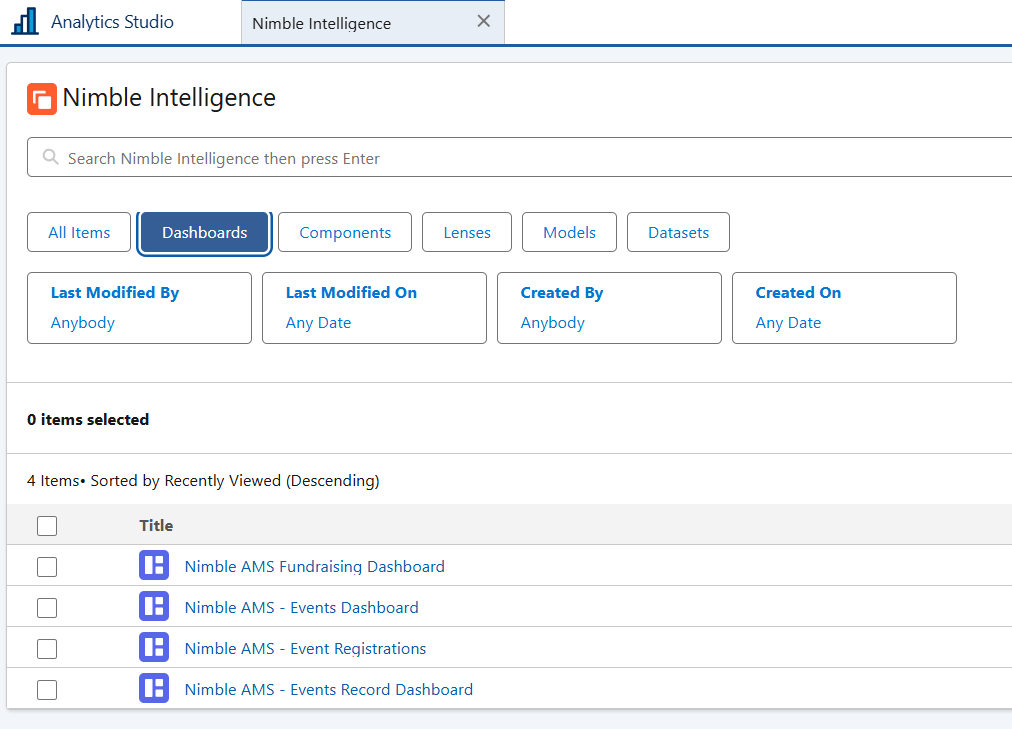
In Analytics Studio, locate and open the Nimble Intelligence app.
-
Use the Share Button to grant access
-
Choose the Users or Groups who have a CRM Analytics license and need to view or interact with the app.
-
-
Confirm User Access to New Fields
Some new custom fields have been added to the Appeal and Event objects. Ensure that users needing to view or edit these fields have the appropriate Field-Level Security (FLS) and Profile/Permission Set access.
|
Object |
Field API Name |
|---|---|
|
NU__Appeal__c |
namz__ActualRevenue__c |
|
NU__Appeal__c |
namz__ExpectedRevenue__c |
|
NU__Appeal__c |
namz__RevenueDifference__c |
|
NU__Event__c |
namz__AdvertisingRevenueGoal__c |
|
NU__Event__c |
namz__ExhibitorRevenueGoal__c |
|
NU__Event__c |
namz__RegistrationRevenueGoal__c |
|
NU__Event__c |
namz__SponsorshipRevenueGoal__c |
|
NU__Event__c |
namz__RevenueGoal__c |
Update Page Layouts to Display New Fields
-
Update the Event Layout
-
Update the Appeal Layout
Training
To help your team get the most out of Nimble Intelligence and CRM Analytics:
Explore In-App Guides:
-
In Analytics Studio, use the learning center link in the left-hand menu to access the learning library.
-
In Salesforce Setup, Navigate to Analytics > Getting Started to learn about CRM Analytics Setup.

Utilize Online Resources:
-
Salesforce Help & Training: Salesforce Help
-
Salesforce TrailHead: CRM Analytics
Configurations
Recipes
-
Navigate to Analytics Studio
-
From the App Launcher (the Salesforce “waffle” icon), select Analytics Studio.
-
-
Open Data Manager
-
In the side menu, click Data Manager to view or create dataflows and recipes.
-
-
Create or Modify Recipes
-
A recipe extracts data from Salesforce objects and external sources, then stages it for analytics.
-
CRM Analytics Plus offers advanced recipes that let you transform, clean, and blend data through a user-friendly interface.
-
Add computed fields, join multiple datasets, and apply filters to get the exact data you need for your dashboards and lenses.
-
You can schedule recipes to run at specified intervals (e.g., nightly or hourly, depending on your data refresh needs).
-

Dashboard Creation
-
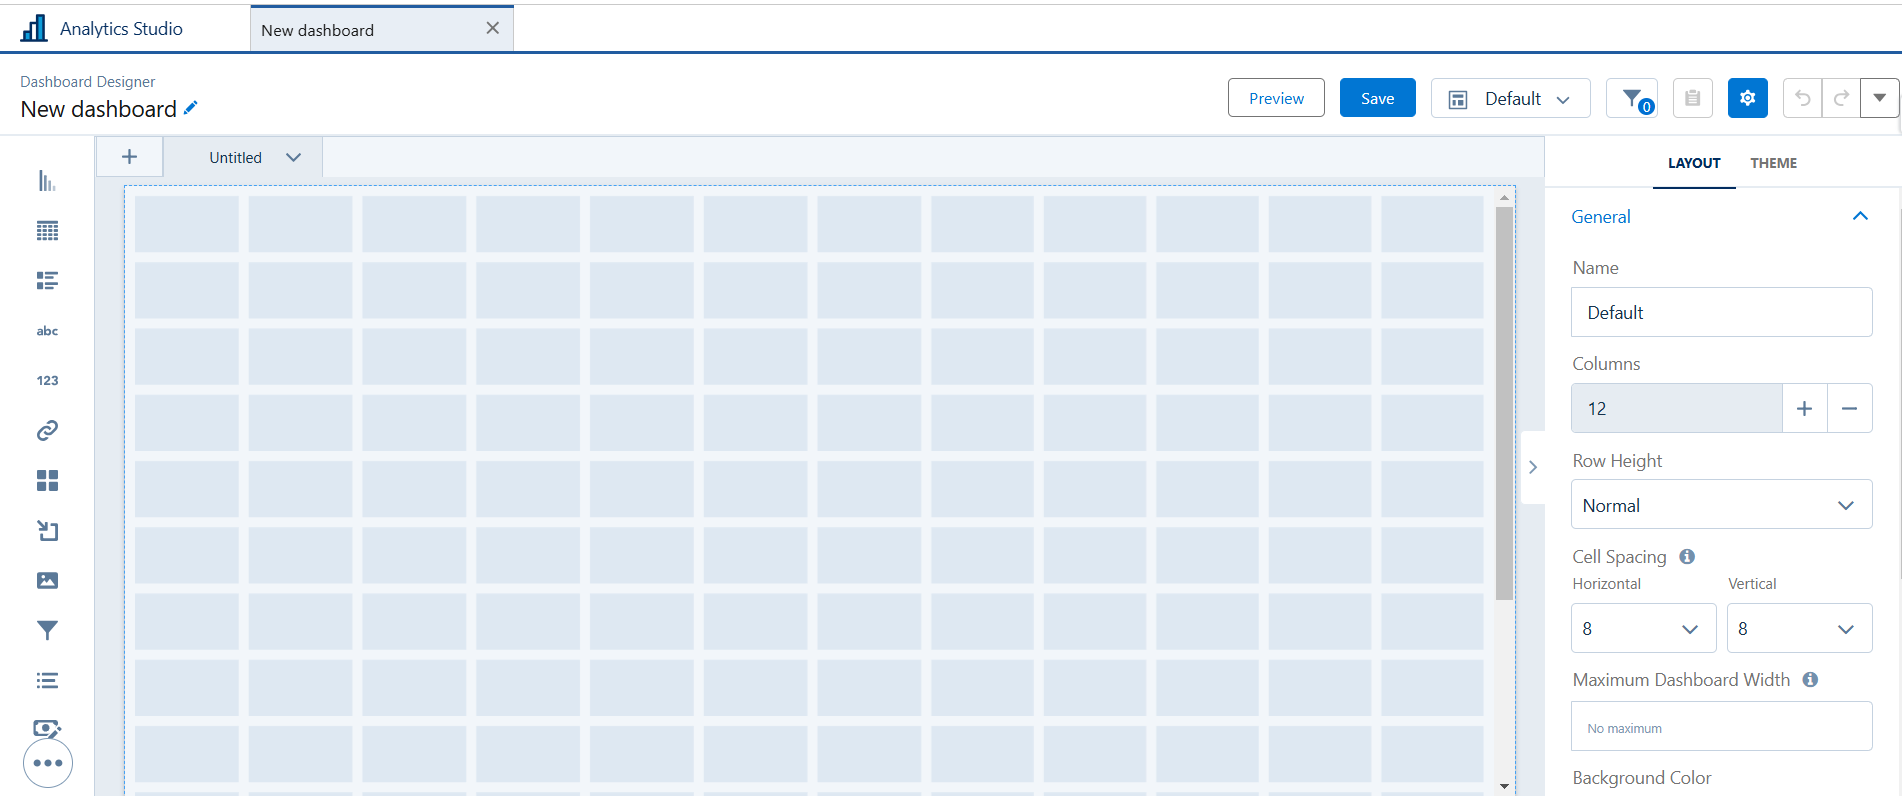
Build Custom Dashboards
-
In Analytics Studio, click Create and select Dashboard.
-
Use the drag-and-drop editor to add widgets, filters, and queries based on datasets you’ve created or loaded via dataflow.
-
Use a blank dashboard or choose a template for a quick start.
-
-
Place interactive dashboards within Salesforce records or custom AMS pages.
-
Permissions & Folder Management
-
Folder Structure
-
Organize your dashboards, lenses, and datasets into folders for easier access control.
-
You might create folders for specific departments, teams, or data categories.
-
-
Assign Access
-
Configure folder-level permissions to control which users or groups can view, edit, or manage analytics assets.
-
Ensure that users only see data relevant to their roles, respecting Salesforce’s sharing and security model.
-
Need More Help?
-
Submit a Ticket: If you’re encountering issues outside the scope of this guide, please Open a Case.
-
Contact Your CSM: Reach out to your Customer Success Manager for strategic guidance on analytics best practices and CRM Analytics Plus use cases.