This enhancement only applies to the customers adopting the new Member Portal (Built on Experience Cloud).
Pro Forma Orders are the Invoice or Quotation Orders that do not create any transactions (no accounting impact) until they are processed.
Whenever the association members create a shopping cart by adding the Nimble AMS products in the Hybrid Community Hub, we create Pro Forma Orders in the backend. Pro Forma Orders exist until the member completely submits the order for processing.
Similarly, the Association's staff professionals can also create the Pro Forma Order and Edit an already created Pro Forma Order in the staff view through the existing Order Processor. Staff can also process the Pro Forma orders by applying for payments or opting to pay later.
Below are the steps on how the staff users can create and edit the Pro Forma Orders in the staff view through the Order Processor.
Create a Pro Forma Order
-
Please navigate to the Account detail record for whom you intend to create a pro forma order. Click on New Order. Alternatively, you can also click on the New button from the Orders Tab.
-
Order Info is the first step in the order process, where you will see a "Let's Get Started" pop-up where you can review and select the,
-
Bill To
-
Order Entity
-
Batch
-
Transaction Date
-
Product Type from the Which type of order do you want to start with? dropdown.
-
-
Click Continue.
-
Add Items is the second step in the order process, where you select the products you want to include in the cart. Depending on the product type you are adding to the cart, you will see a different page in this step.
-
Select the products you want to purchase
-
Click Save.
-
The Verify Cart step of the order process is where you review the cart item(s) in the cart. To update products that need to be updated, you can click to edit or delete them. You can also apply the coupon if you intend to do so on this screen.
-
The Tax and Shipping step is part of the order process, seen only when you have a cart item(s) containing taxable or shippable products. Fill in the relevant information and proceed by clicking on the Go To Payment button.
-
The Payment step of the order process is where staff can choose to,
-
Create a Pro Forma Order by clicking on the Save as Pro Forma button.
-
Or, Apply for Payments and Submit Order button. This button will only appear once the payment is applied to the cart.
-
Or submit the Order without applying for Payments by clicking on the Submit Without Payment button.
-
-
Click Save as Pro Forma.
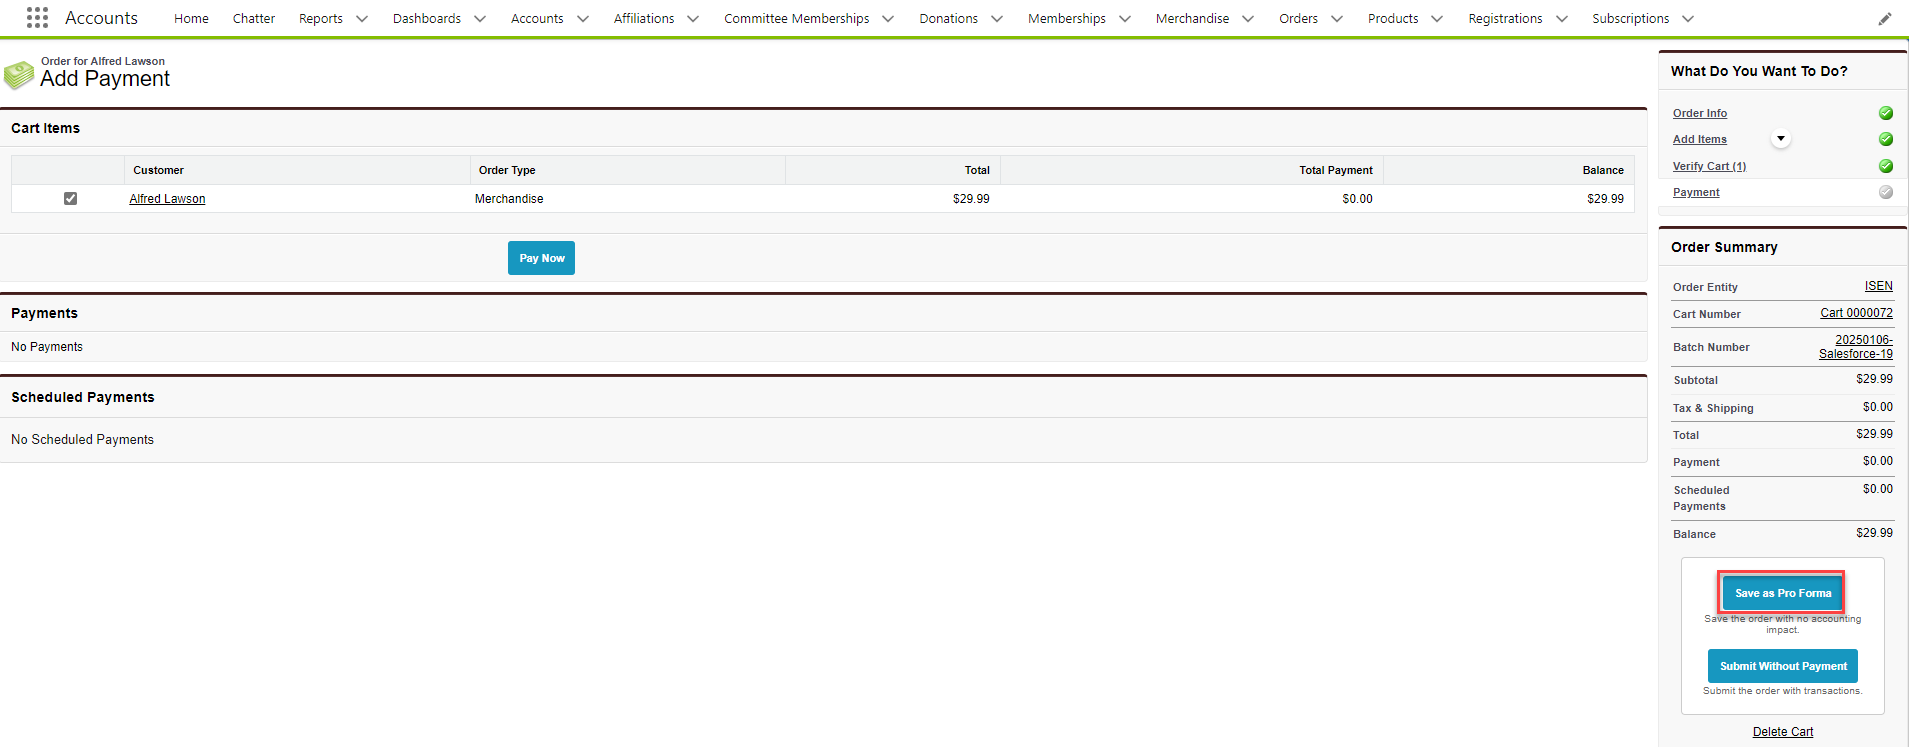
Figure 1. The screenshot shows the Save as Pro Forma button.
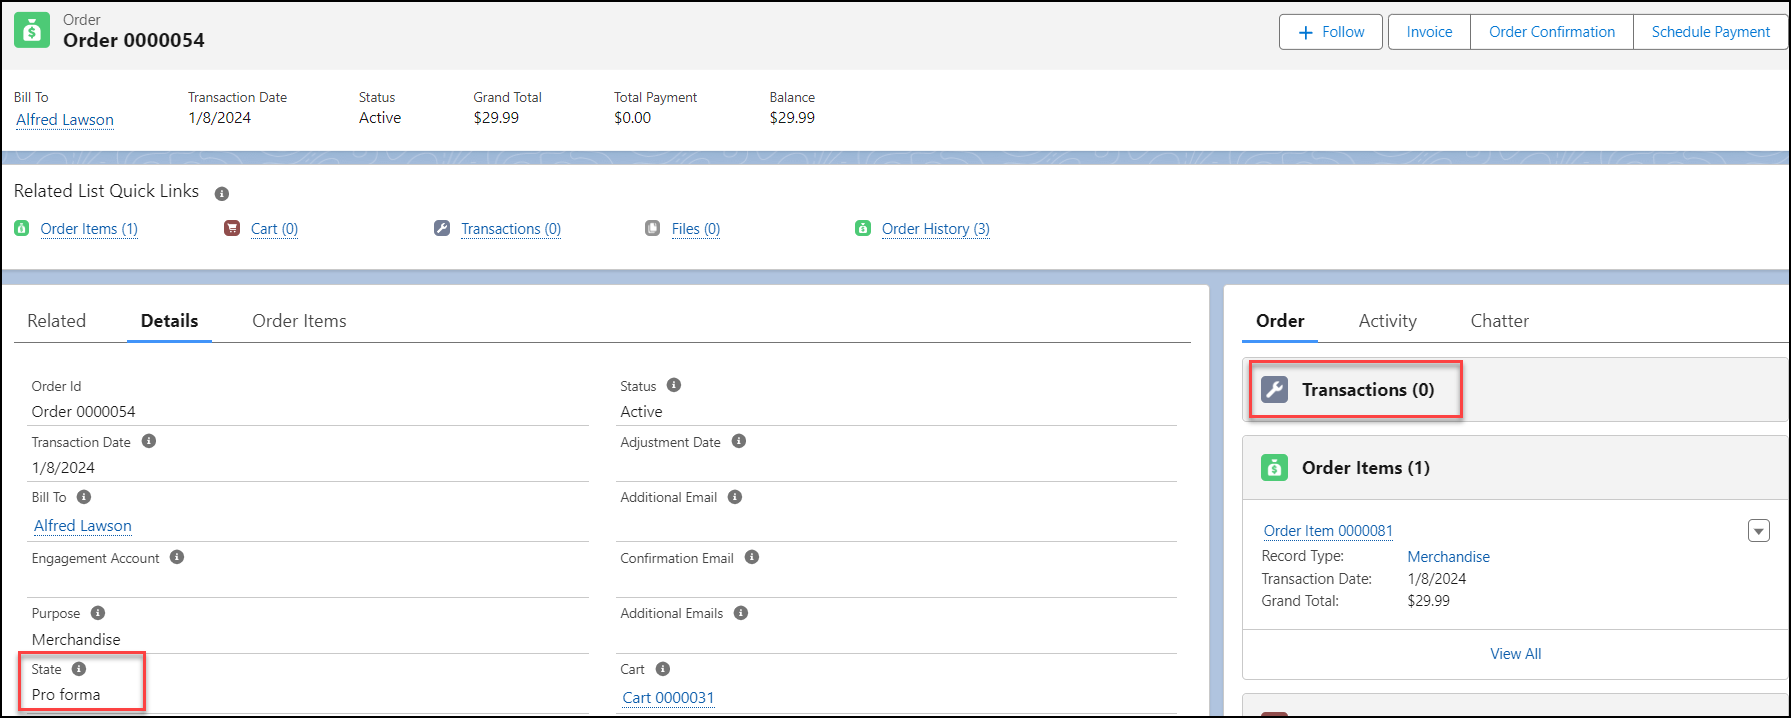
Figure 2. The screenshot shows the Order Detail record.
Expected Result:
The Order Processor will be automatically closed. Staff users will be redirected to the Order detail record with the State field populated as Pro Forma, and no transaction records will be created.
Edit a Pro Forma Order
Members can create Pro Forma Orders during their interaction with the Hybrid Community Hub, or Pro Forma Orders could also have been created by the process specified above. However once a Pro Forma Order has been created, there might be a need to edit the order to add more products, remove already added products, change pricing, apply coupons to provide a member-specific discount, or correct a mistake. As a staff professional, you can carry out these tasks in the staff view through the Order Processor.
Staff users can now Edit pro forma orders by following the steps below.
-
In the tab bar, click App Launcher, or in Salesforce Classic, click + Nimble AMS, Staff View, Button, and All Tabs.
-
Click Orders.
-
Click the Order ID and click Edit or select Edit from the dropdown on the order record. This will open the Order Processor.
-
Alternatively, In the Salesforce Classic Staff View, you can access the account's "Orders" related list and click "Edit" next to the order ID.
-
Alternatively, In the Lightning Experience Staff View, you can access the account's "Orders" related list and click drop-down, select Edit.
-
-
You will see an "Order Information" dialog box to review and update key fields if required.
-
Click Continue.
-
You will be redirected to the Verify Cart step of the order process where you can review the cart item(s) in the cart. To update products that need to be updated, you can click to edit or delete them. You can also apply the Coupon if you intend to on this screen. If you need to modify the item(s) currently included in the order:
-
Click "Edit" next to the cart item.
-
Add/Remove items or adjust quantities as needed.
-
Click Save.
-
-
Alternatively, If you need to add any new products to the order:
-
Click on the Add Items drop-down from the right-hand side panel of the page.
-
Choose the item type.
-
Add the Items and quantities as per requirement and click Save.
-
-
The Tax and Shipping step will be displayed if your cart has any taxable or shippable products. Apply modifications if any, and click on the Go To Payment button.
-
The Payment step of the order process is where staff can choose to,
-
Save the changes made back to the Pro Forma Order that is edited by clicking on the Save as Pro Forma button.
-
or, Apply for Payments and Submit Order button. This button will only appear once the payment is applied to the cart.
-
or Submit the Order without applying for Payments by clicking on the Submit Without Payment button.
-
-
Click Save as Pro Forma.
Expected Result:
Order Processor will be automatically closed. Staff users will be redirected to the Order detail record with the State field populated as Pro Forma and changes applied will be synced. There will be no transaction records created.
Delete a Pro Forma Order
A delete Pro Forma orders capability enables users to remove Pro Forma orders that are no longer required, helping maintain accurate records. To delete a Pro Forma order, users should navigate to the order detail record page of the appropriate order which they wish to delete, and confirm the deletion action. Note that once an order is deleted, it cannot be recovered. Ensure that all relevant information is reviewed before proceeding with deletion.
To delete a Pro Forma order staff users should follow the steps below.
-
In the tab bar, click App Launcher, or in Salesforce Classic, click + Nimble AMS, Staff View, Button, and All Tabs.
-
Click Orders.
-
Select the desired Order ID from the dropdown menu and click Delete,
Or -
Click on the Order ID to navigate to the Order Detail Record page, then click the Delete button.
-
Alternatively, In the Salesforce Classic Staff View, you can access the account's "Orders" related list and click "Delete" next to the order id.
-
Alternatively, In the Lightning Experience Staff View, you can access the account's "Orders" related list and click drop-down, select Delete.
5. After clicking Delete, an order deletion confirmation message will pop up. Review the message and select Delete to proceed with deleting the order.
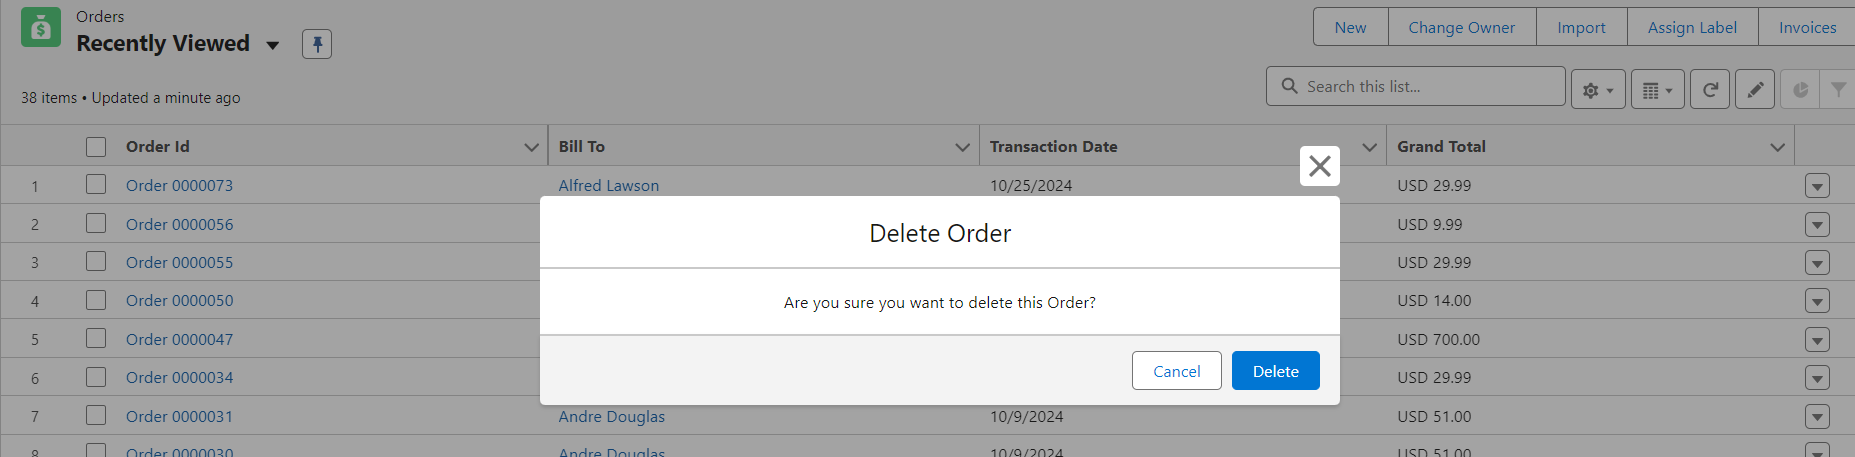
Figure 3. The screenshot shows the order deletion confirmation popup.
The selected order is permanently deleted from the system and no longer appears in the order list. A notification confirms the successful deletion.
If an association wants to delete Pro Forma orders in bulk, they have the following options:
-
Select multiple Pro Forma orders from the order list view and delete them directly.
-
Alternatively, you can write a script to query and delete the desired records.
Express Pay for Carts in the Member Portal
Nimble AMS has provided ways to allow your association members to effortlessly make payments in the Member Portal for invoices with outstanding balances, where you can send an email containing a unique URL that directs them to a page where they can view the invoice in full, and use a streamlined payment process.
Creating an Outstanding Balance
Often, staff professionals can create an outstanding balance that needs payment in a few different ways:
-
Create a single pro forma order using the order process as we have mentioned above.
-
Create a single order using the order process without submitting payment.
-
Create multiple orders using a bulk process, like if your association uses accrual billing.
-
Create an order or multiple orders using automation, like a workflow or process.
-
Create a single cart using the order process without submitting it.
-
Create multiple carts using a bulk process, like if your association uses cash billing.
-
Create a cart or multiple carts using automation, like a workflow or process.
When it comes to express payment of Orders (Pro Forma and Accrual orders that are unpaid), you refer to this document: Experience Cloud Checkout URL
But when it comes to the payment of Carts, the association can send an email with the payment URL allowing constituents to view and settle their invoice with ease. The Express Payment page can be accessed with a shareable URL, Member Portal Checkout URL, which can be retrieved from the Cart record. Once constituents click on the URL, it opens the payment page in the Member Portal where the order with an outstanding balance is displayed. They will be able to review the order, select the shipping option, and pay for the order through the payment options available.
Express Pay in Member Portal can be accessed by both logged-in and guest members, thereby simplifying the payment process and making it faster and more efficient for both staff and members.
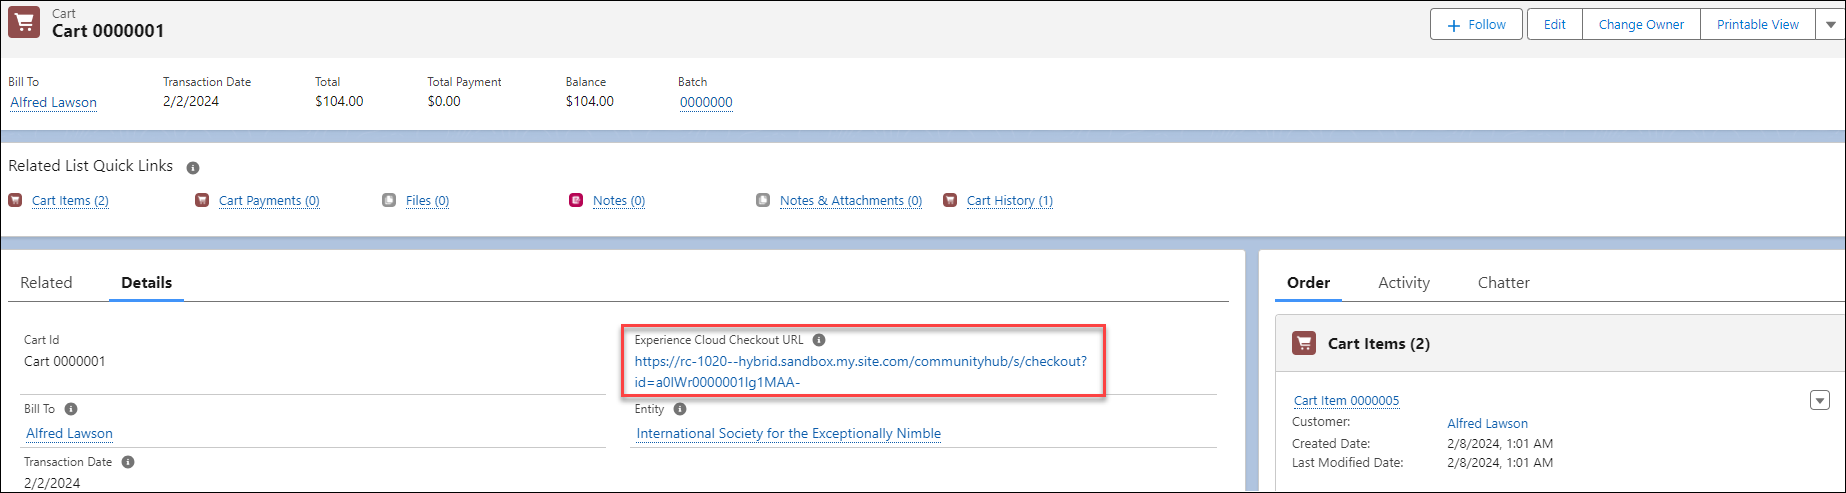
Figure 3. The screenshot shows the Member Portal Checkout URL on the Cart record page.
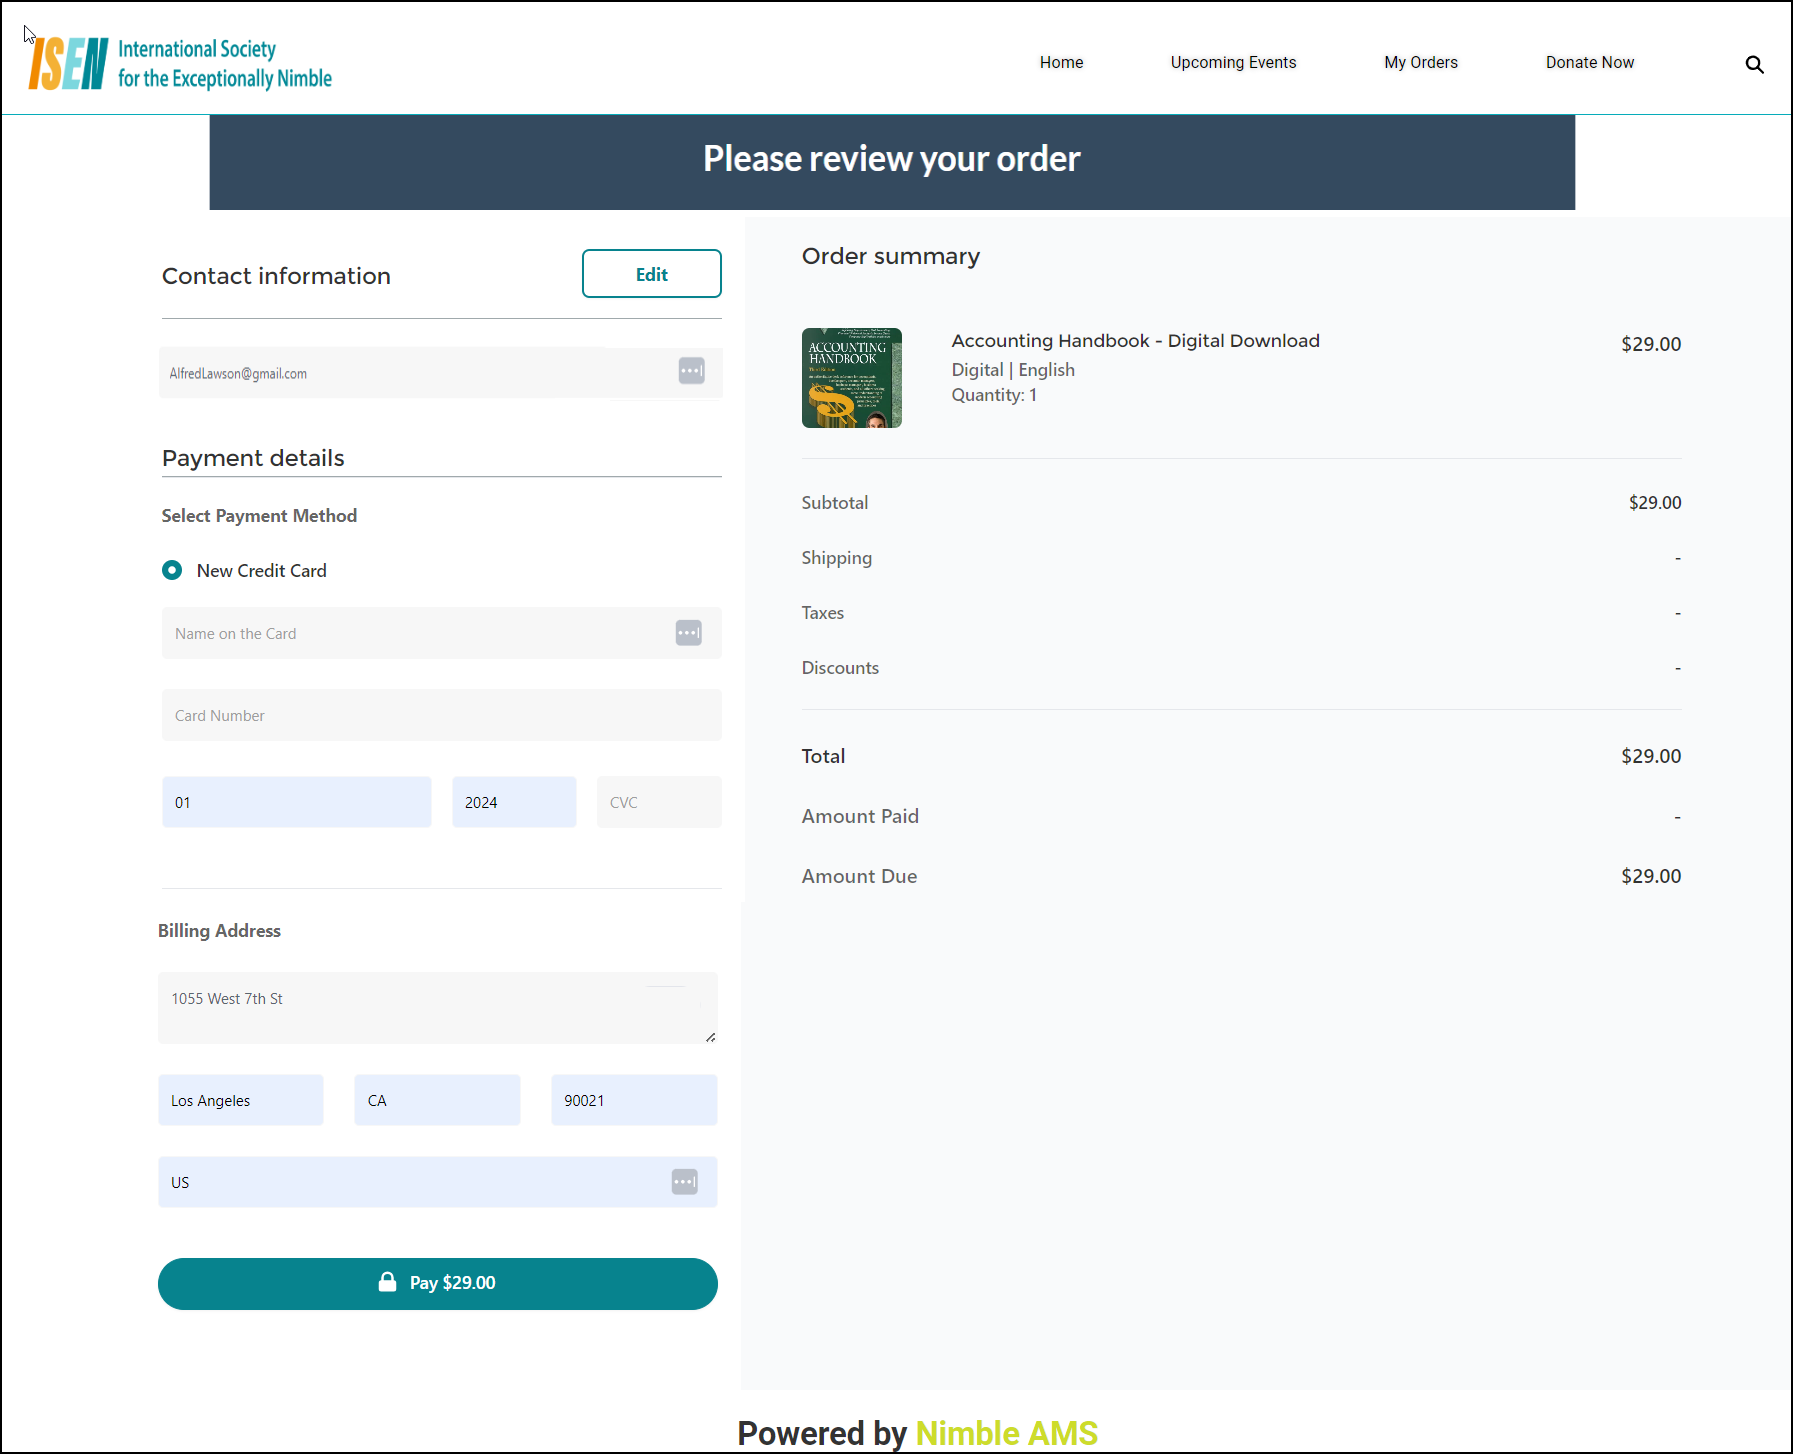
Figure 4. Member Portal Checkout page for making payments.