Nimble AMS now includes two event microsites, which are public communities built on Salesforce Community Cloud. A microsite is a custom branded content site that lives outside of the brand URL.
Event microsites are perfect for showcasing your large events like annual conferences. Using Community Workspaces and Community Builder, staff can rapidly point-and-click configure these template sites to match the association's theme, style, and event content, and then publish them for public access. These microsites are dedicated communities that exist alongside Community Hub in your Nimble AMS org, so community management is handled for each one separately, allowing for granular theming and design on a site-by-site basis.
Enabling the Microsites
Learn how to Customize Communities with Community Builder.
To have the microsites added to your org, please contact Nimble AMS Support.
Viewing and Managing the Microsites
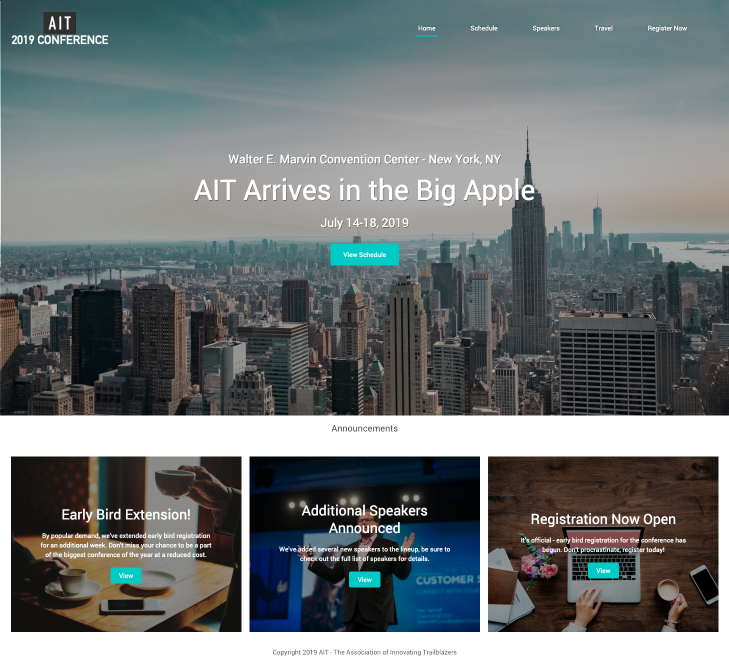
Once the microsites are added to your org, you can access them. The event microsites are Salesforce communities and, by default, are called 2019 Conference and 2020 Conference.
Show Me the 2019 Template...
Show Me the 2020 Template...
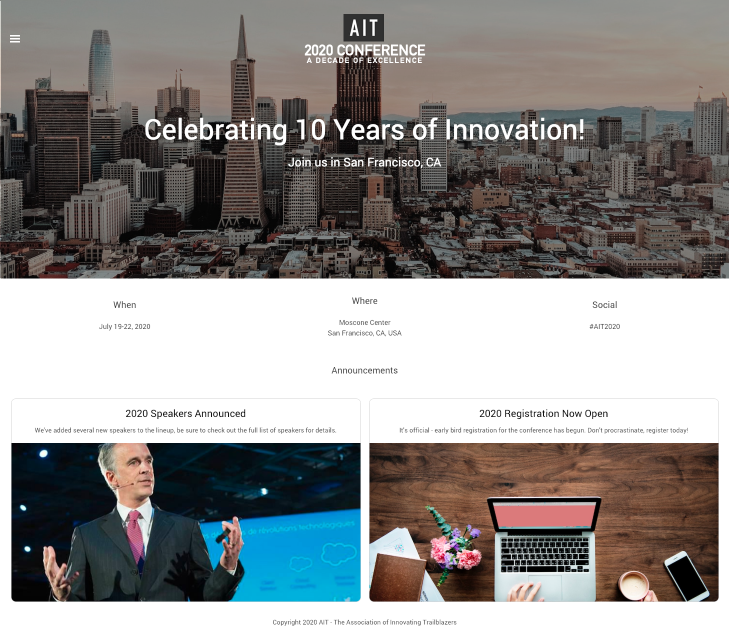
Nimble AMS gives you a big head start by laying out the theme, navigation, and some default pages and content for you so you can very easily modify it to match your event content. Management of the community is all done via Community Workspaces.
-
Go to Setup > All Communities
-
For either the
2019 Conferenceor2020 Conference, click Workspaces
Getting Started
From Community Workspaces, you can access anything you need to manage the the site. One of the first things you should do is rename the site and change the URL:
-
Go to Setup → All Communities. This will give you a list of the event microsite templates that have been deployed to your organization by Nimble AMS Support.
-
Click on Workspaces. This will load the main Community Workspace menu.
-
From Community Workspaces, click Administration
-
in the Settings area, click the pencil icon next to the name:
-
Change the
NameandURLto match your event name. -
Click Save.
From here, you can click the top-left, where it says Administration, and move into building out your pages and theme.
-
Click Administration in the top-left and select Builder.
-
Use the Community Builder to change the theme and layout of pages.
Next Steps
After renaming your site and URL, and customizing pages with the Builder, you likely want to update some of the content or even expose content from your CMS. There are a ton of options in Community Workspaces, so we recommend learning how to Manage Your Community with Community Workspaces to understand everything you can do and how to do it.