My Orders
My Orders Lightning Web Component (LWC) displays a list of Orders once placed on the Experience Cloud Lightning page. My Orders LWC is powered by the Data Source API that lets the Admins plug the purpose-built data sources if required.
Although Nimble AMS will be shipping one pre-created Out-of-the-Box data source to be readily used by the customers, Association admins or app builders can build their own data source using SOQL or APEX and use it on the My Orders LWC.
The Lightning Component can be found under the list of Components in Experience/Community Builder.
Configuration Options
Learn more about Experience Builder here.
Navigate to the Builder of the site.
From the components list on the left panel, select the My Orders component and drag it onto the site page.
On the page, click within the My Orders component to bring up the Property editor.
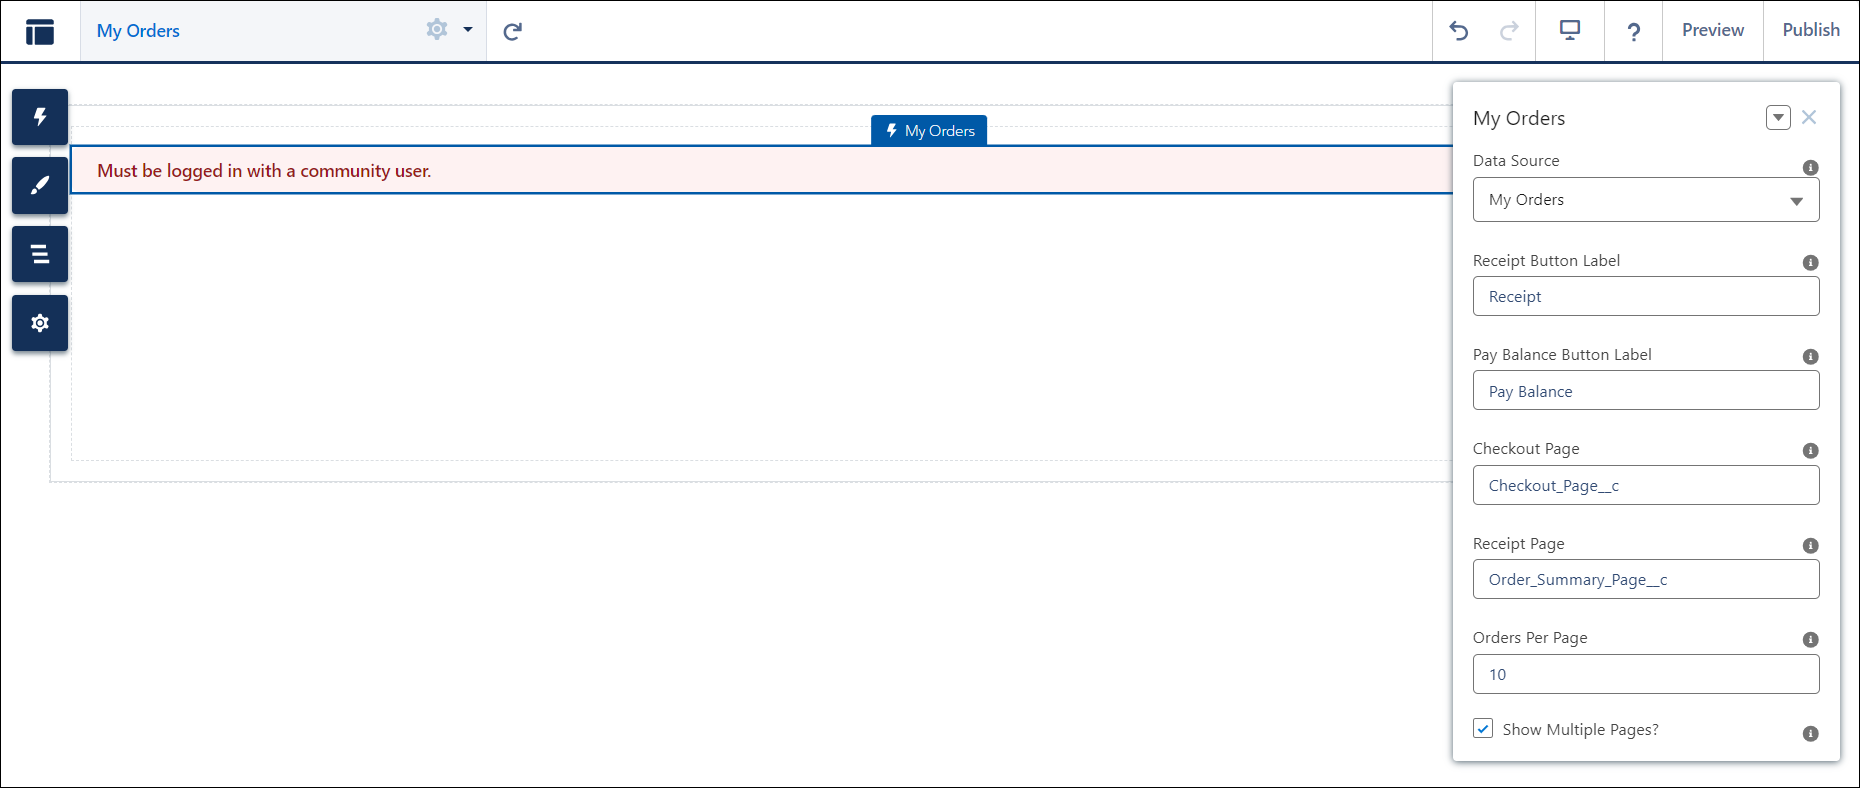
Figure 1. My Orders LWC with configuration properties
|
Property |
Details |
|---|---|
|
Data Source |
Determines what information is to be displayed to the members. Select the appropriate Data Source to ensure accurate and tailored content to be displayed within the My Orders LWC. Out-of-the-Box, Nimble AMS will be shipping one pre-created data source to be readily used by the Customers. Label Name of the Data Source: This data source will be able to fetch below orders:
Association admins or app builders can build their own data source using SOQL or APEX and use it on the My Orders LWC.
|
|
Receipt Button Label |
The Receipt Button Label field displays the default value “Receipt”. Enter label for button (Example: Receipt) which redirects to Order summary or Payment Receipt page. The 'Receipt' button will appear conditionally. The receipt button is exclusively displayed against the Orders that have 0 balance or are already fully paid.
|
|
Pay Balance Button Label |
The Pay Balance Button Label field displays the default value “Pay Balance”. Enter a label for the button (Example: Pay Balance) which redirects to the Order Payment or Checkout page. The 'Pay Balance' button will appear conditionally. The Pay Balance button is exclusively displayed against the Orders that have a balance greater than 0 or unpaid Orders.
|
|
Checkout Page |
It determines the destination page where the user will be directed after clicking on the Pay Balance button. To navigate to the Classic/Visualforce Checkout page, enter "/communityhub/experienceinvoice" in this property field. To navigate to the Experience Cloud Checkout page, enter the API name of the My Checkout page created in Experience Builder, in this property field.
|
|
Receipt Page |
It determines the destination/location of the page where the user will be directed after clicking on the Receipt button. To navigate to the Classic/Visualforce Order summary page, enter "/communityhub/znc2__OrderSummary" in this property field. To navigate to the Experience Cloud Order summary page, enter the API name of the Orders Summary page created in Experience Builder, in this property field.
|
|
Orders Per Page |
Enter a number indicating the amount of orders to be displayed per page. Ensure that the value falls within the range of 3 to 30. It is recommended to have a value as 10.
|
|
Show Multiple Pages? |
To show multiple pages of orders, the checkbox should be selected. If you want to hide the multiple pages or pagination, simply uncheck the checkbox. |
Examples
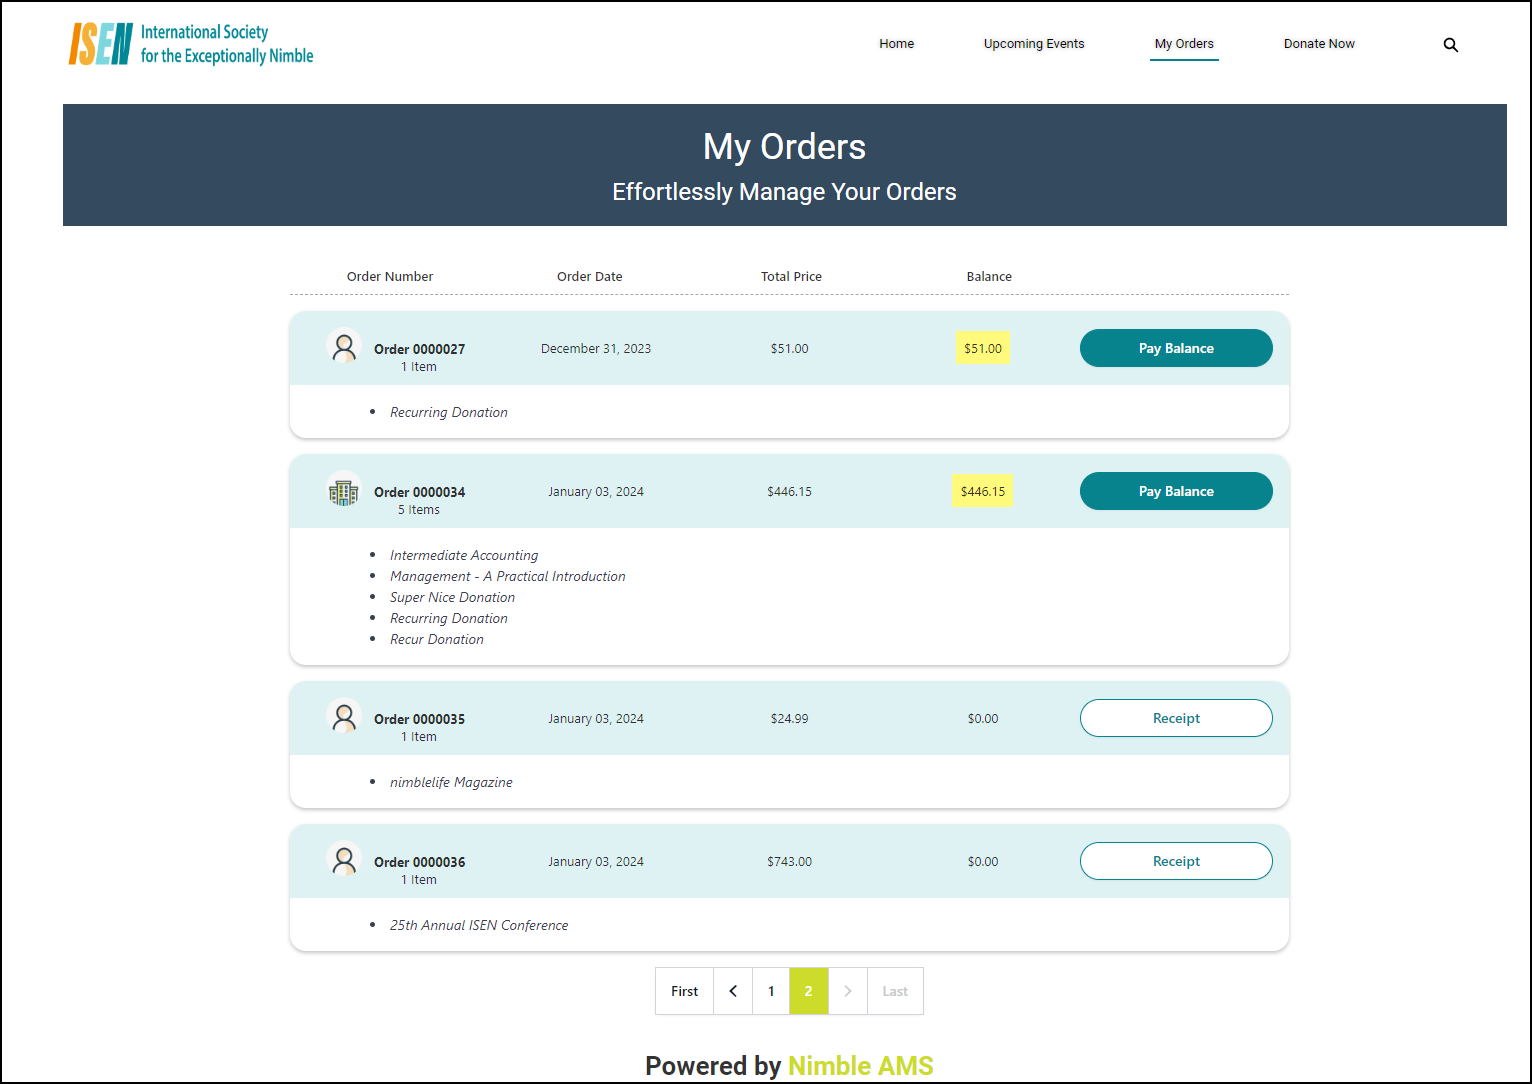
Figure 2. My Orders page in Experience Cloud Community Hub.