Overview
Members who click on the ‘My Payment Methods’ option from the Community Hub page will be seamlessly navigated to the Member Portal page where My Payment Methods LWC will be displayed. This component/feature is purpose-built to allow members to manage their stored payment information in Nimble AMS.
This feature can be used within the Hybrid Community Hub where a few pages of the Community Hub are in Visualforce and one or many pages are in the Member Portal.
As an example: If the associations want to keep all of their community hub pages in Visualforce (existing CH) and just want to use My Payment Methods in the Member Portal, we allow them to do so. From the Account Navigation or other navigation menus, a member can click on the My Payment Methods option and they will be easily navigated to the Member Portal page where they can interact with the My Payment Methods LWC to perform their required actions.
Interacting with the Payment Methods
My Payment Methods in Member Portal allow members to perform below activities:
-
View the already stored payment profiles that are linked to his/her member profile.
-
Add a new Credit/Debit Card to his/her Member profile.
-
Add a new Bank Account to his/her Member profile.
-
Edit the already stored Credit/Debit card information against his/her member profile.
-
Edit the already stored Bank Account information against his/her member profile.
-
Delete or Remove the stored payment information from his/her member profile.
-
Set one of the stored payment information as the default on his/her member profile.
Let’s dive into each of these actions to understand better.
View the Stored Payment Profiles
Members can view their stored payment methods and take specific actions based on their needs. My Payment Methods in Member Portal displays all the stored payment methods against a member profile. It can be a Credit Card, Debit Card, or Bank Account.
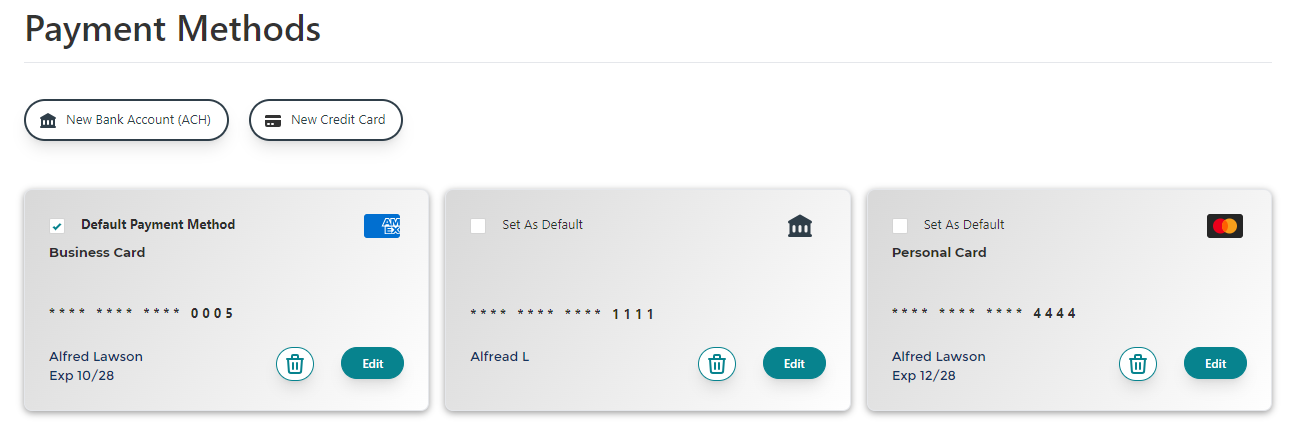
Figure 1. The screenshot shows the stored payment methods.
Adding a Credit/Debit Card
Members can store their credit or debit card information against their Nimble AMS Account which can be later used to perform financial transactions while placing a Nimble AMS order.
Steps to Add a Credit/Debit Card:
-
Members can simply click on the "New Credit Card" button.
-
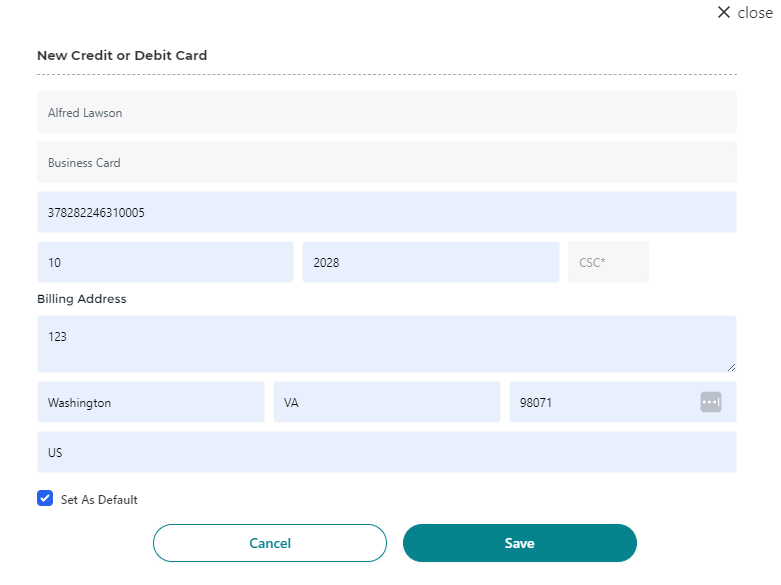
A New Credit/ Debit Card window opens.
-
Fill in the required details.
Information of the card holder that needs to be entered:
-
Name on the Card: Enter the name associated with your credit or debit card. -
Nickname (Optional): Enter a nickname for your credit or debit card. This field is optional.
Adding a nickname to a credit or debit card makes it easier to identify and organize multiple payment methods and helps in choosing the appropriate card.
-
Card Number: Enter the unique number on the front of your credit or debit card. -
Month: Enter the expiration month of the card. -
Year: Enter the expiration year of the card. -
CSC: Enter the Card Security Code. The CSC is a three or four-digit security code that is typically located on the back of your credit or debit card. It can also be called CVV (Card Verification Value) or CVC (Card Verification Code).
Billing Address
-
Street: Enter the street or house number -
City: Enter the city. -
State: Enter the state or region. -
Postal Code: Enter the postal or ZIP code. -
Select Country: Enter the country associated with the billing address. -
Set As default: To set the payment method as default, check the box.
-
-
Click Save.
Once the payment method has been saved successfully, the member will be prompted with the message, “You have successfully added Payment Method”.
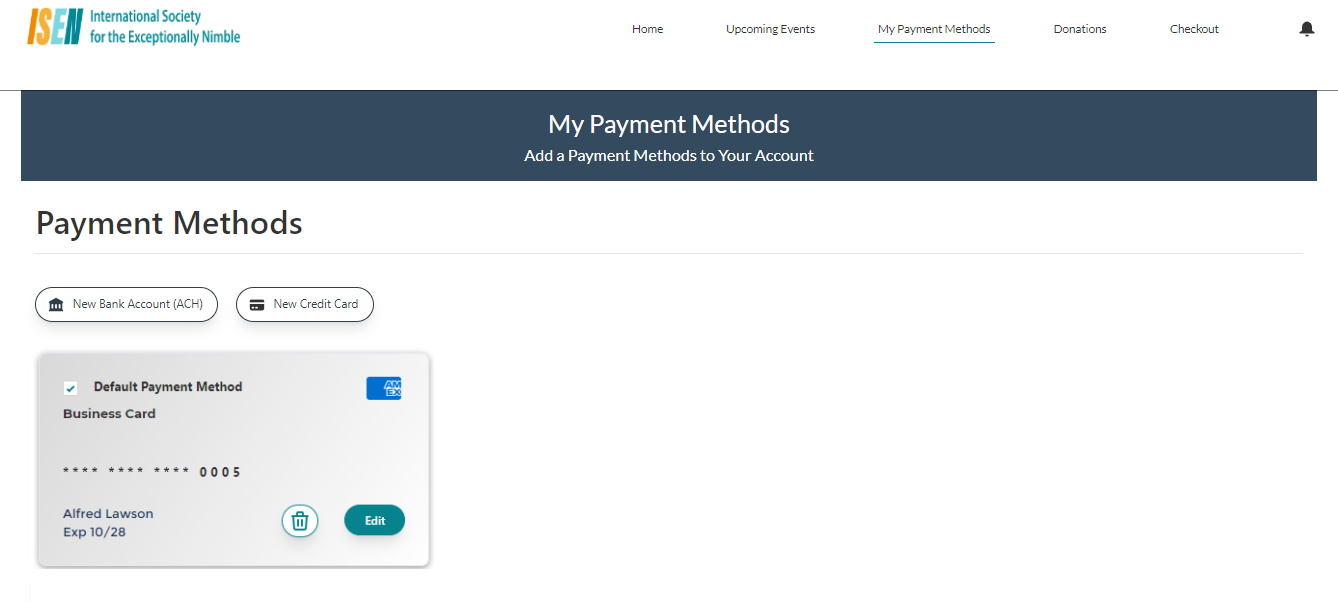
Figure 2. The screenshot shows the successful addition of the Credit/Debit Card.
Adding a Bank Account (ACH)
Members can also store their Bank Account information against their Nimble AMS Account which can be later used to perform financial transactions while placing a Nimble AMS order.
Steps to Add a Bank Account:
-
Members can simply click on the "New Bank Account (ACH)" button.
-
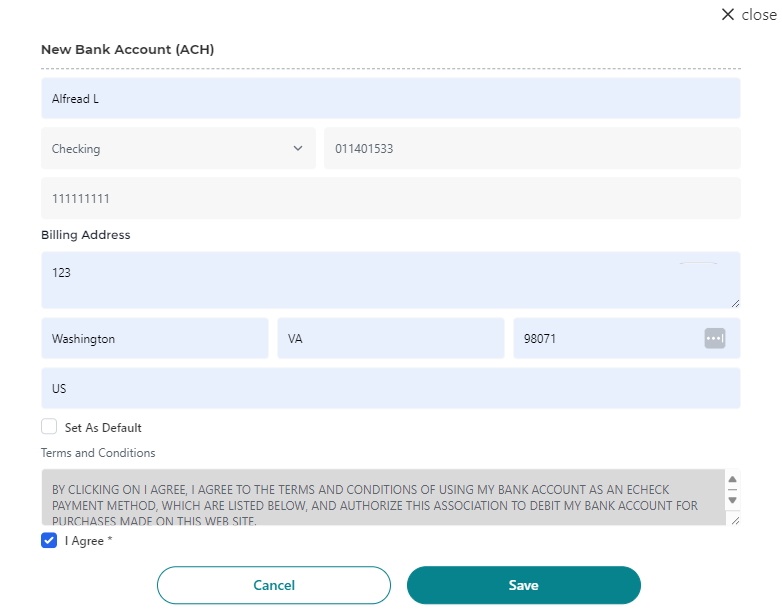
A New Bank Account (ACH) window opens.
-
Fill in the required details.
Information of the Bank Account holder that needs to be entered:
-
Name on the Bank Account: Enter the name associated with the bank account. -
Type of Bank Account: Users can choose from the dropdown list, which offers three options:-
Checking: Select this option if you are providing the bank account detail that is a personal checking account.
-
Savings: Select this option if you are providing the bank account detail that is a personal savings account.
-
Business Checking: Select this option if you are providing the bank account detail that is a business checking account.
-
-
Routing Number: Enter the routing number for your bank account. -
Account Number: Enter the Account Number associated with your bank account.
Billing Address
-
Street: Enter the street or house number -
City: Enter the city. -
State: Enter the state or region. -
Postal Code: Enter the postal or ZIP code. -
Select Country: Enter the country associated with the billing address. -
Set As default: To set the payment method as default, check the box.
Terms and Conditions
-
I Agree: Carefully read the terms and conditions and tick the checkbox “I Agree” before proceeding to save the bank account.
-
-
Click Save.
Once the payment method has been saved then it displays the message, “You have successfully added Payment Method”.
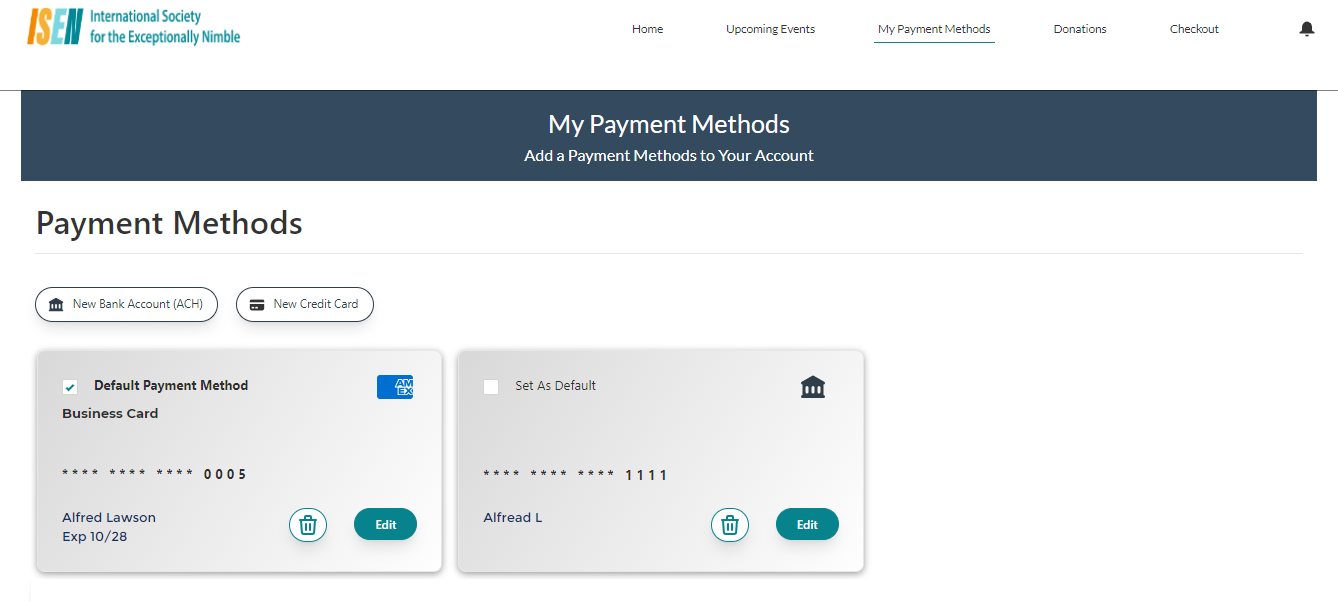
Figure 3. The screenshot shows the successful addition of the Bank Account.
Managing the Stored Payment Information
Members can self-serve by managing their already added payment information. Members can edit the existing stored payment information, they can delete their stored payment information, and they can set their other stored payment information as default as per their needs.
Edit the Stored Payment Information
-
Members who want to edit their payment details can simply click on the

-
Edit Credit/ Debit Card window opens if they want to edit the already saved Credit/Debit card information. The Edit Bank Account (ACH) window opens up if they want to edit the already saved Bank Account details.
-
A few information will be auto-populated such as Name, Nickname (Optional), and Billing Address.
-
Fill in the required details.
-
Click Save.
-
A confirmation message will be displayed on a successful updating of the details.
Nimble AMS does not save the sensitive information of the member’s payment profile such as the Credit/Debit Card number and CSC or the Bank Account Number and Routing Number.
Show Me an Image

Figure 4. The screenshot displays the window for editing Credit Card details.
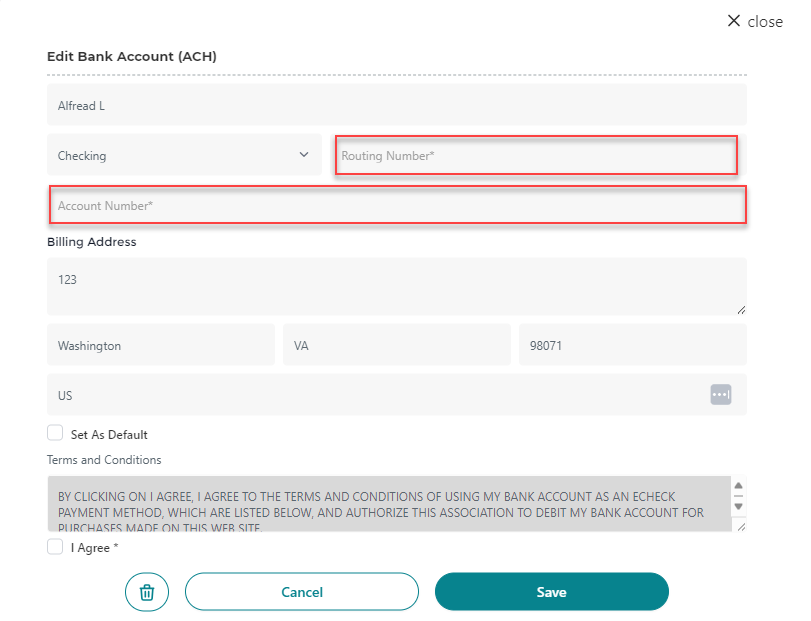
Figure 5. The screenshot displays the window for editing Bank Account details.
Delete/Remove the Stored Payment Information
-
Members who want to delete their payment details can simply click on the

-
A confirmation message will be displayed on a successful deletion of the saved payment profile.
Members will not be able to remove a particular stored payment profile if that payment profile is linked to an ongoing schedule. Members will be prompted with an error and will be guided to first replace the payment profile against the ongoing schedules and then perform the deletion action again.
Set a particular Payment Profile as a Default
Members can set their payment profile as default. If any of the payment profiles are set as default, then members get ease to choose to pay for their orders using the Saved Payment Methods, and Nimble auto-selects the default payment profile, thereby reducing the number of clicks and increasing convenience.
-
Members who want to set a particular payment profile as default, just need to tick the checkbox “Set As Default”.
-
This action will mark that particular payment profile as default for future transactions.
-
Members can also choose to mark the payment profile as default while they are adding a new payment profile or while editing the existing payment profile.
Members can mark only one payment profile as Default. Multiple Payment Profiles cannot be marked as default.