Nimble AMS enables association members to purchase registration products through a modern, enjoyable, and seamless shopping experience. Members can purchase registration products when they view the details of upcoming events, register for a selected event, select the session(s) from the options provided, make an informed decision to checkout, and complete the registration process. The system automatically creates the necessary order and financial transactions once the payment is made.
Register for an Event in the Member Portal Community Hub
The Events Catalog page in the Member Portal enables a constituent to browse through the list of upcoming events hosted by the association. Once a member decides to register for an event, they click on the Register button which will take the user to the Event Registration page. For detailed information on browsing through the list of upcoming events, please see the Events Catalog page.
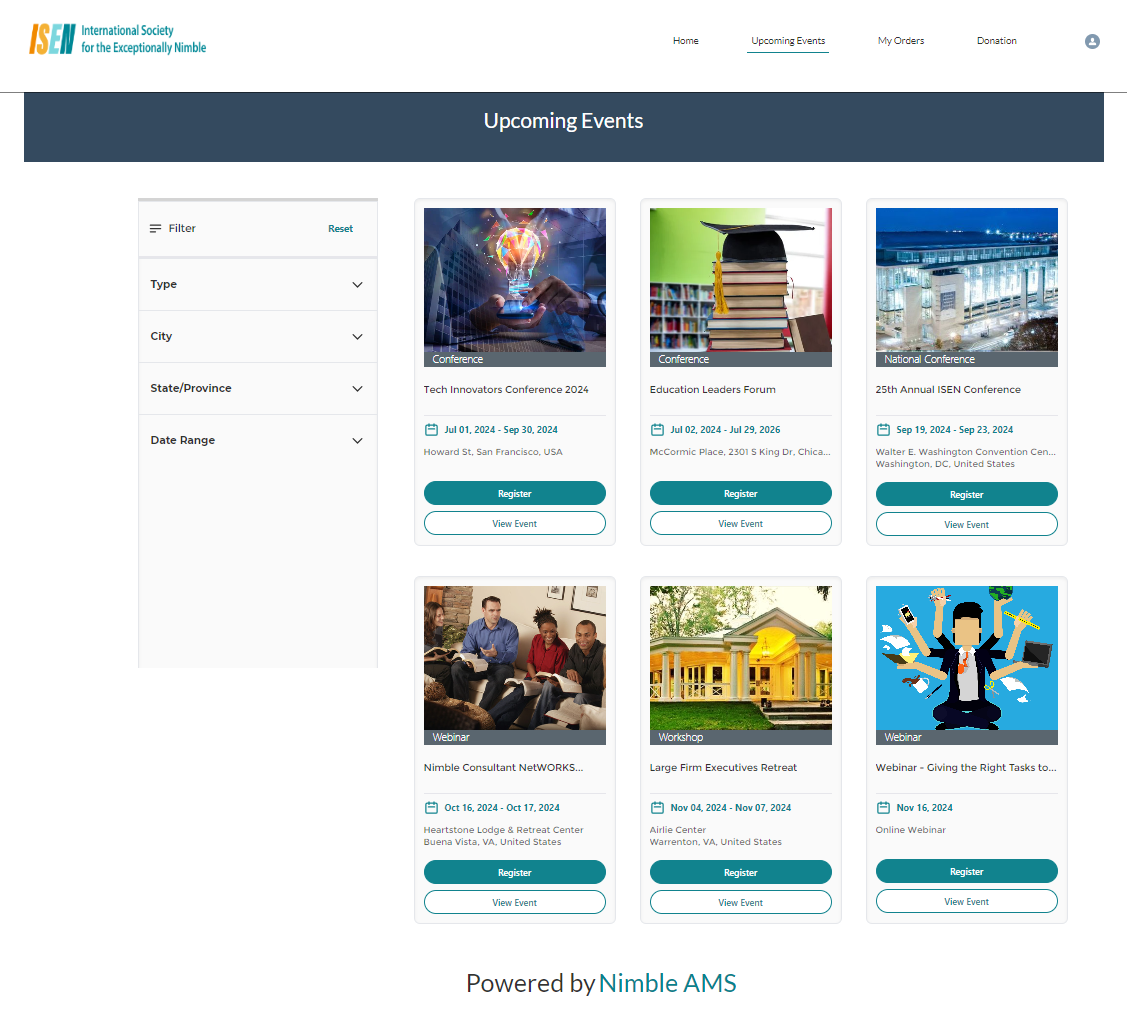
Figure 1. Events Discovery page in the Member Portal shows a list of different upcoming events with available filters
To purchase a registration product, constituents can click on the Register button located on the individual Event card from the Event Catalog page or through the Register button on the Event Details page.
-
The Register button will navigate constituents to the registration page. The constituent will select their registration type, choose the sessions they want to attend provide the badge information, and answer any questions that the association may be collecting information on.
If the event is a webinar event and no sessions or event questions have been configured, the user will be directed to the Member Portal Checkout page, once they click Register.
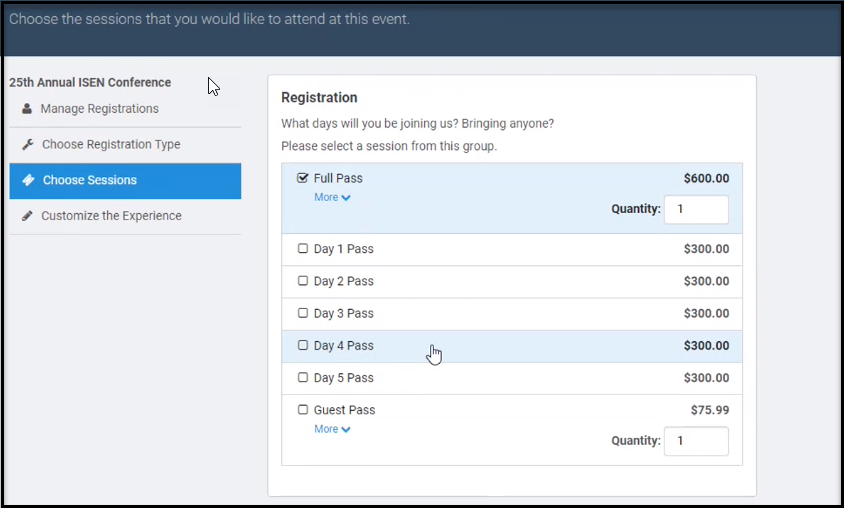
Figure 2. Registration page in Visualforce where constituents can select different sessions for the event
2. Once the Registration product, sessions, and additional details as applicable have been selected. the constituent clicks on the Checkout button. The system directs the constituent to the Member Portal Checkout page where they can make a payment to complete the registration.
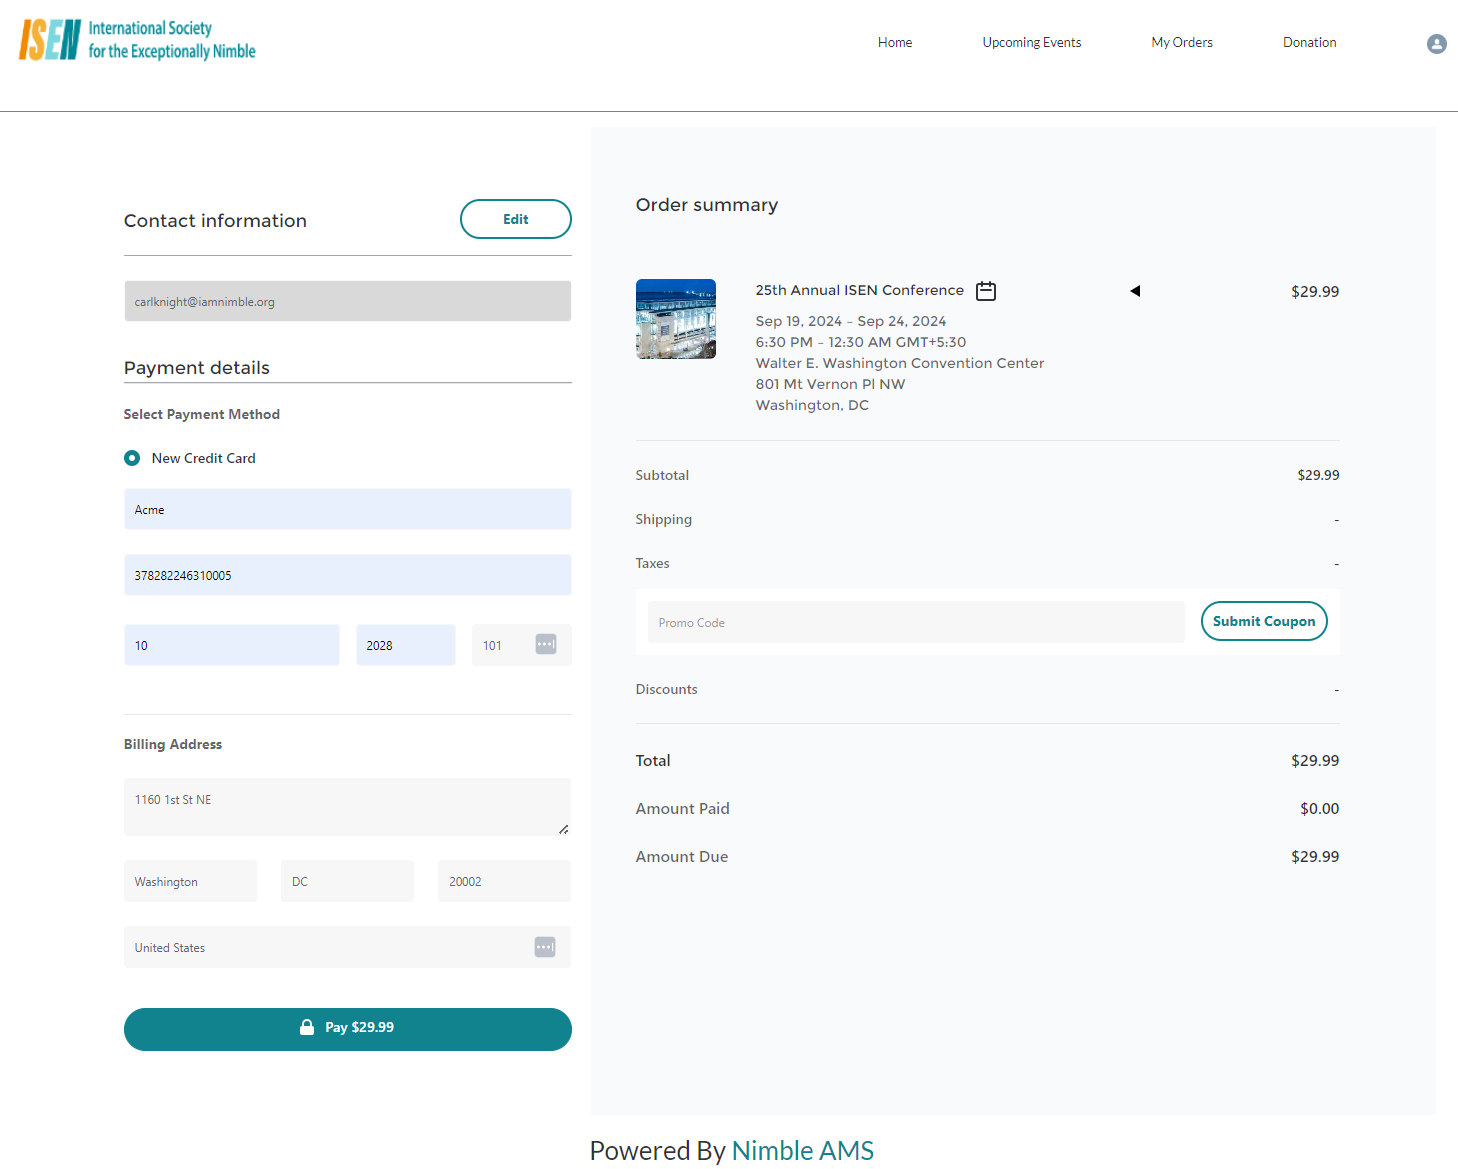
Figure 3. Member Portal Checkout page with the itemized details of the Event Registration
3. In the situation where the constituent wants to make a change to their selection, they can make changes using the Edit or Delete button on the Shopping Cart page. Click on the Back to the Shopping Cart button to go to the shopping cart page.
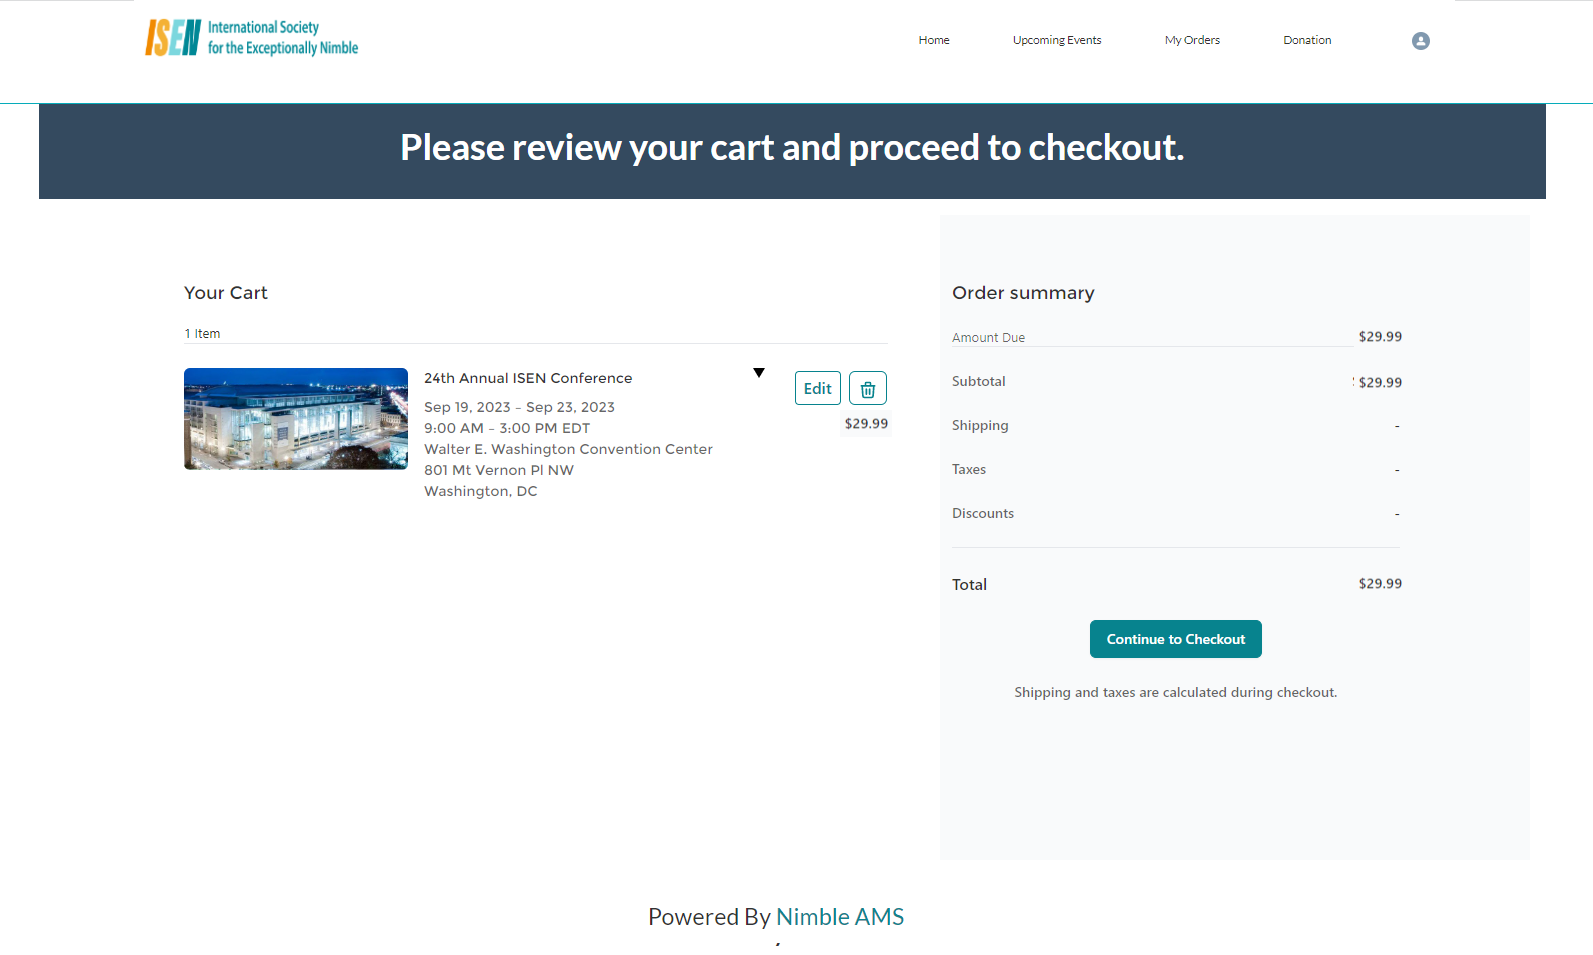
Figure 4. The Shopping Cart page shows the Event registration details
4. Clicking the Edit button next to the Event name redirects them back to the registration session page, where they can change their registration details. Clicking the Delete icon available next to the Event name deletes the entire registration. Similarly, individual registration can also be deleted if multiple individuals were registered for an event through the Delete buttons available next to each registrant.
5. Once the constituent is satisfied with their selection, they can click on Continue to Checkout button to arrive at the checkout page where they make payment using one of their stored payment methods or through a new Credit Card. Upon successful payment, they see a confirmation page.

Figure 5. Payment Confirmation & Order Summary in Member Portal
When a non-member adds a membership product to the cart, member pricing can be applied to other non-membership products in the same checkout. If the membership product is removed, pricing for other products reverts to non-member rates. This functionality is a standard bulk pricing manager.
We have enhanced the custom bulk pricing manager, and associations can benefit from the improvements by implementing the enhanced context fields.
The "Add to Calendar" icon allows association members to easily add event details to their digital calendars, ensuring accuracy and convenience. It supports multiple platforms like Google Calendar and Outlook, helping users set reminders and increasing the likelihood of event attendance. The "Add to Calendar" button typically generates an .ics file or uses a link that integrates directly with various calendar services.
Show Me An Image
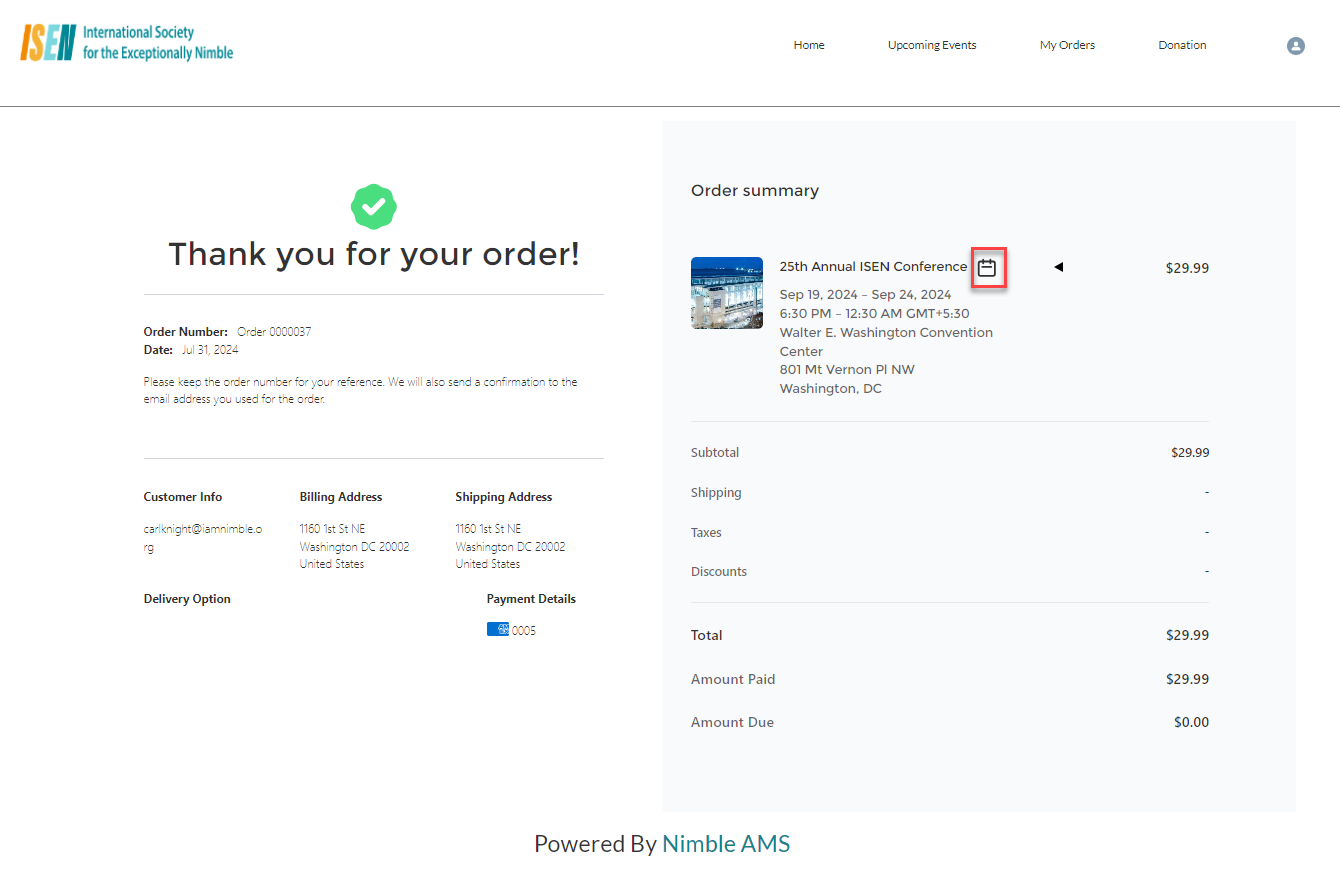
Figure 6. The Screenshot shows the Add To Calendar icon.
If the order total amounts to zero, the payment information section will be automatically hidden and a Submit button will be shown.