Once the Sales Cloud Connector is configured on an org, Staff Users can convert an Opportunity to a Nimble AMS Order. With a single click of a button, they can launch the Convert To Order wizard from the Opportunity record, preview the order details and confirm to convert the Opportunity to a Nimble AMS Order.
To convert an opportunity to a Nimble AMS order, you must add Nimble AMS products that are supported within the Sales Cloud Connector feature to the opportunity by creating an opportunity product record. After this, convert the opportunity to a Nimble AMS order using the Convert To Order button on the Opportunity record.
Depending upon the selected record type of Nimble AMS product, the page layout may vary.
9. Enter the following details:
Opportunity Product Name: enter a name to assign to the Opportunity Product.
Opportunity: leave the value as is, or search and select the Opportunity record to be linked to Opportunity Product.
In case Membership is selected as the record type in step 7, you will get the Membership Type field. Select a value from the dropdown. The products in the next step will then be fetched based on the primary products of the selected Membership Type.
In case Advertisement,Exhibit or Sponsorships is selected as the record type in step 7, you will get the Event field. Select a value from the dropdown or leave it blank. The products in the next step will then be fetched based on the value you selected against the Event field.
Product: Search and select the Nimble AMS product to be linked to the opportunity record.
Unit Price: The selected product's unit price will be automatically populated. You can change the unit price of the product if necessary.
Click Save.
Expected Result
Staff users will be redirected to the Opportunity detail record page.
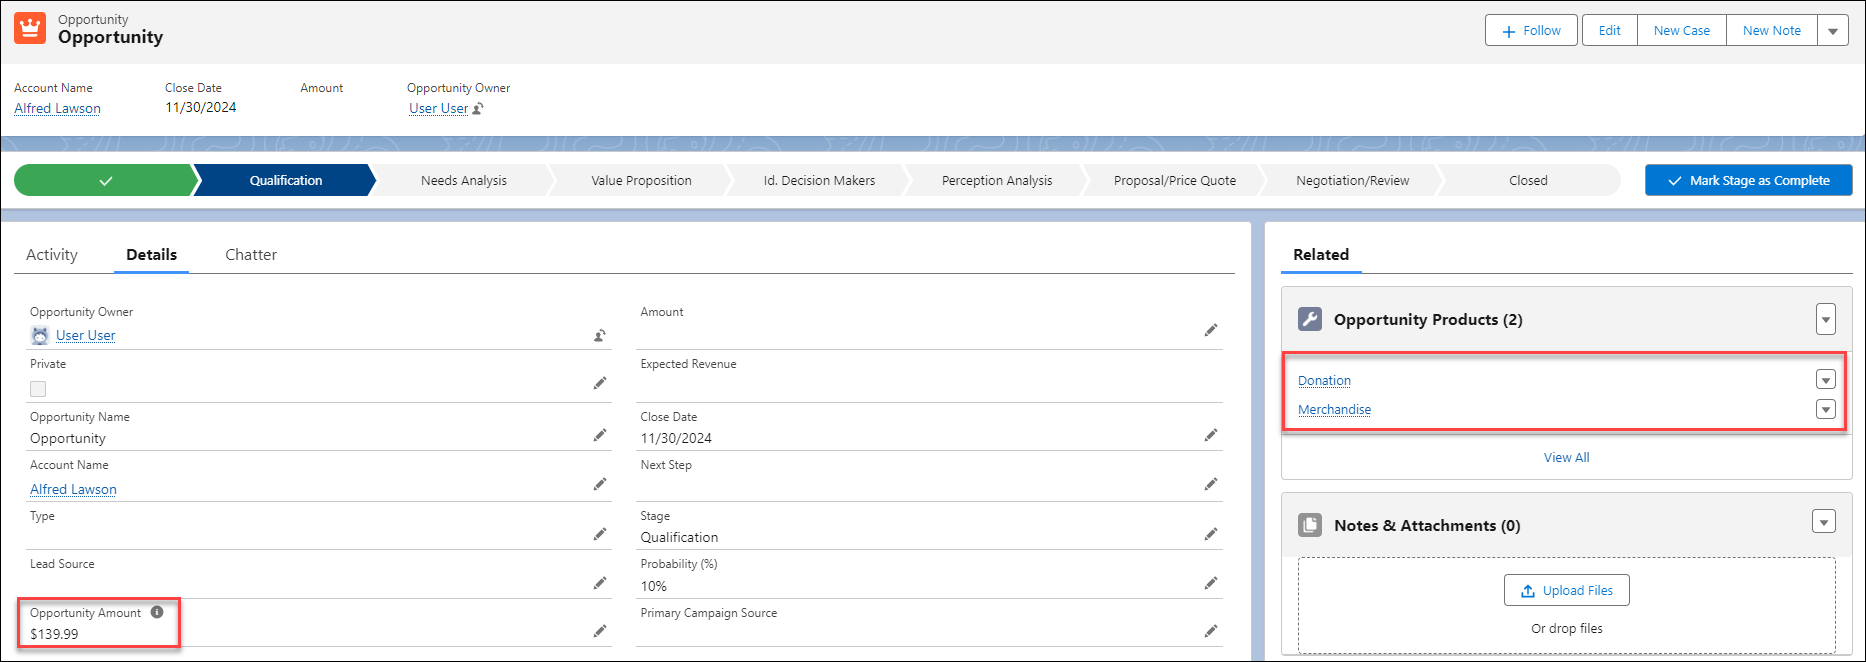
On the Opportunity detail record page, the Opportunity Amount field displays the summation of the prices of Nimble AMS products linked to the Opportunity record.
Note
Since the Opportunity Amount field is not displayed by default, Edit the page layoutto add this field to the Opportunity detail record page.
Figure 1: The Screenshot shows the Opportunity detail record page.
Convert an Opportunity to a Nimble AMS Order
After adding a Nimble AMS product to the opportunity record, you can convert an opportunity to a Nimble AMS Order. In this case, let's assume the Convert to Order button is added to the opportunity record. To convert an opportunity to a Nimble AMS Order, follow the steps given below:
Scroll up to the top of the Opportunity record and click the expand icon on the top ribbon.
From the dropdown that appears, click Convert to Order.
In the pop-up that appears, update/enter the following details:
Bill To: the name of the account linked to the Opportunity record is populated. If you wish to update the value, you can remove the pre-populated account and add the new one.
Customer: the account name linked to Opportunity will be populated. You can remove the existing value and update the field if you wish to select a different customer.
Order Entity: the entity that is set as the Primary Entity will be pre-populated. You can update this by selecting a new value from the picklist for financial entry tracking.
Batch: leave the value as is, or if required, select a value from the drop-down. This field will be pre-populated with Automatic Batch value, but manual batch can be selected by selecting a new value from the picklist to manage financial transactions.
Transaction Date: the current date will be populated. If required, you can update this value by selecting a new value from the picklist for financial entry tracking.
In the product list, Opportunity products will appear automatically. If you do not want any specific Nimble AMS product to be part of an order, uncheck the checkbox and proceed.
Click Convert.
An Order Confirmation pop-up will appear, displaying a link to go to the order.
Click Close.
Expected Result
The Opportunity is now converted to a Nimble AMS Order and should be linked to the related Account. You can also access the order from the Related List on the Opportunity record.
Expected Result
Users can edit any details of the product on Convert Opportunity To Order wizard by clicking Convert To Order button.
JavaScript errors detected
Please note, these errors can depend on your browser setup.
If this problem persists, please contact our support.