View the details of a product
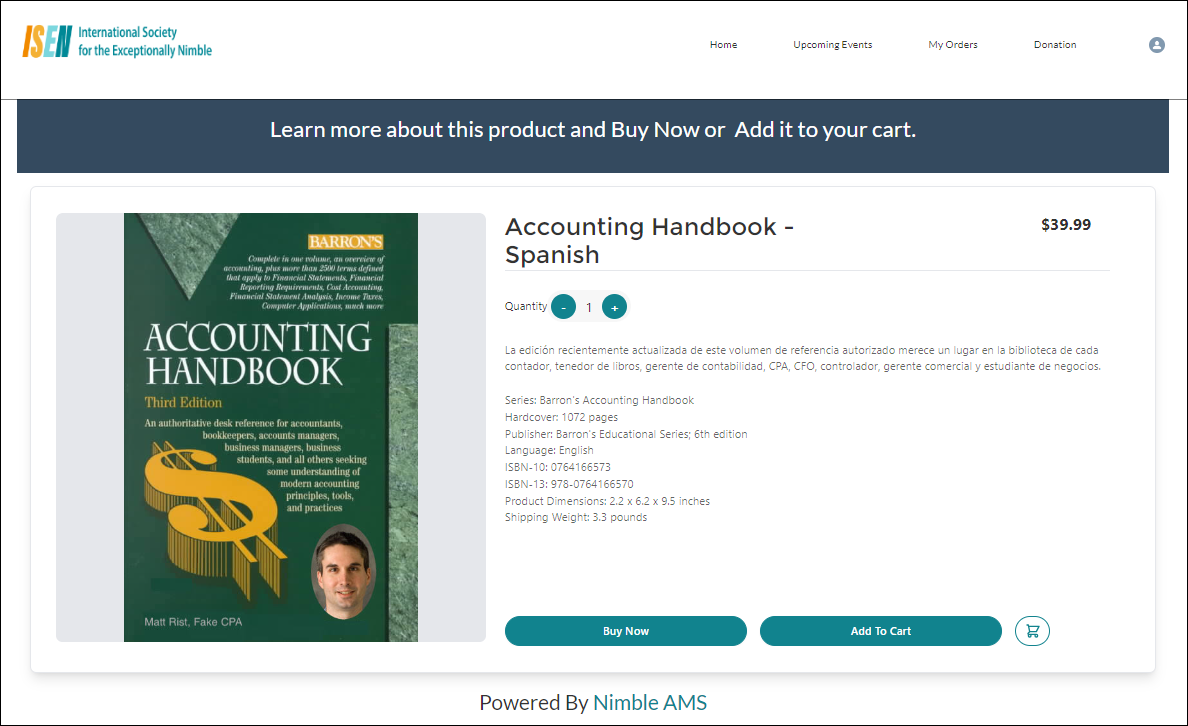
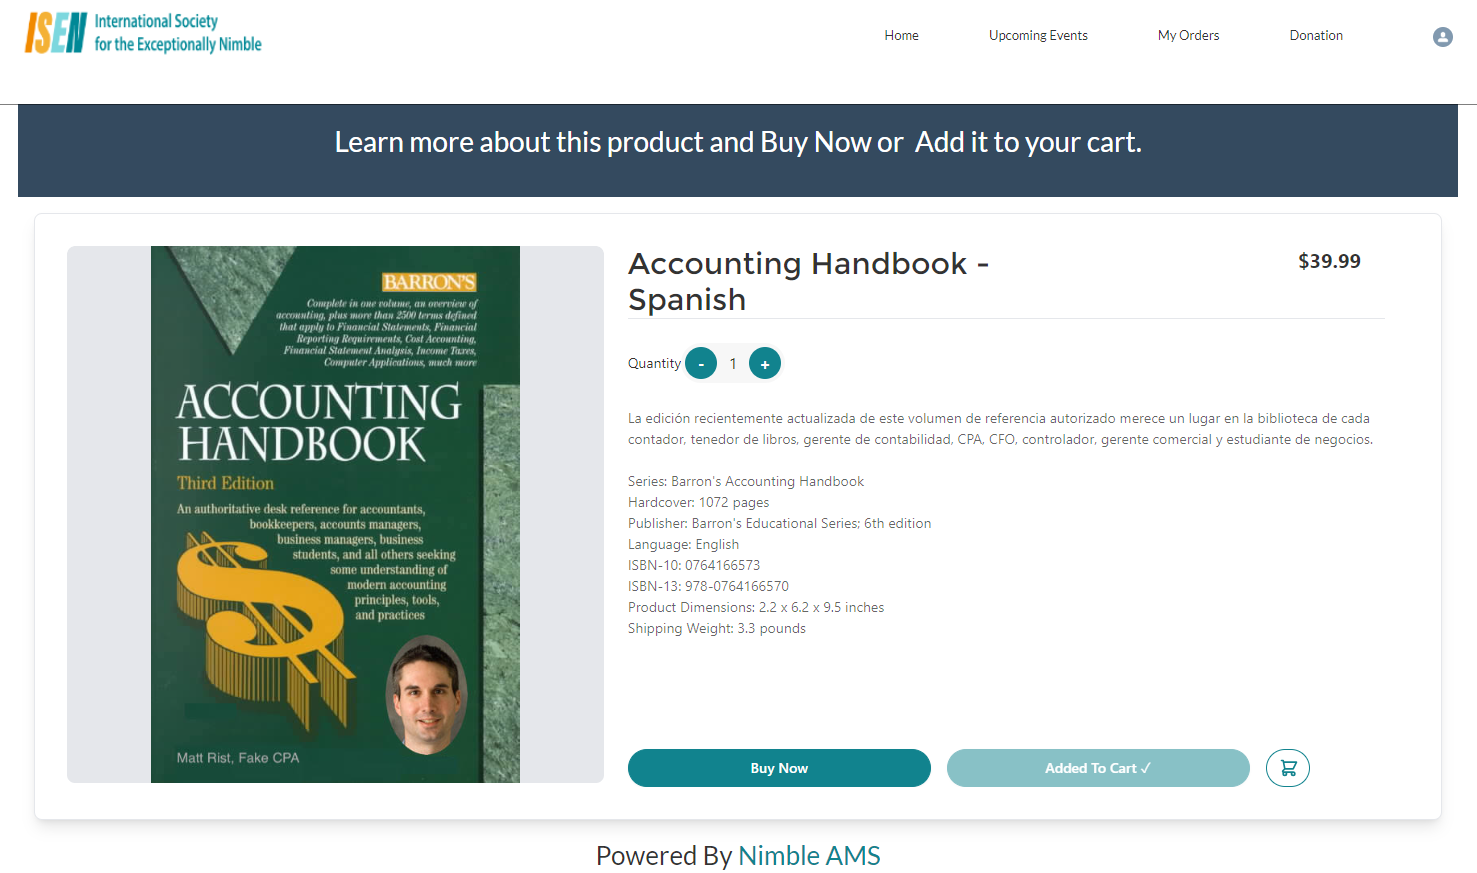
Association members can browse through the various merchandise products (including downloadable products) available for purchase through the association's online store. They can view additional product information by clicking on any of the merchandise products in the store. For each merchandise product, they see the image, name, description, and price of the product. The product's list price is displayed to the guest user. A special price, when applicable, is displayed when a user logs into Member Portal. They will also be able to choose the quantity that they want to purchase.
If the association offers variations within the same product, use the Product Variant feature to provide members with a superior experience when they are browsing the product details.
They can click on either Buy Now or Add to Cart button to proceed. During the checkout process, the appropriate tax is calculated if the merchandise product is taxable. Members can change their shipping address and pick a shipping method. Once the purchase transaction has been completed successfully, then the system creates inventory records on the back end, and the inventory-related numbers on the product are updated correctly so that the staff can respond when the inventory runs low.
How can members change the quantity of items?
Members can use the Quantity element to modify the quantity of merchandise products as needed when viewing product details. This allows for adjustments in case the maximum number allowed is exceeded or if there is a low inventory of a product. The quantity option is conveniently situated right below the product name for easy access. Members can effortlessly adjust the number of items by clicking on the [+] or [-] buttons.
In certain situations, messages will appear on the screen (as listed below):
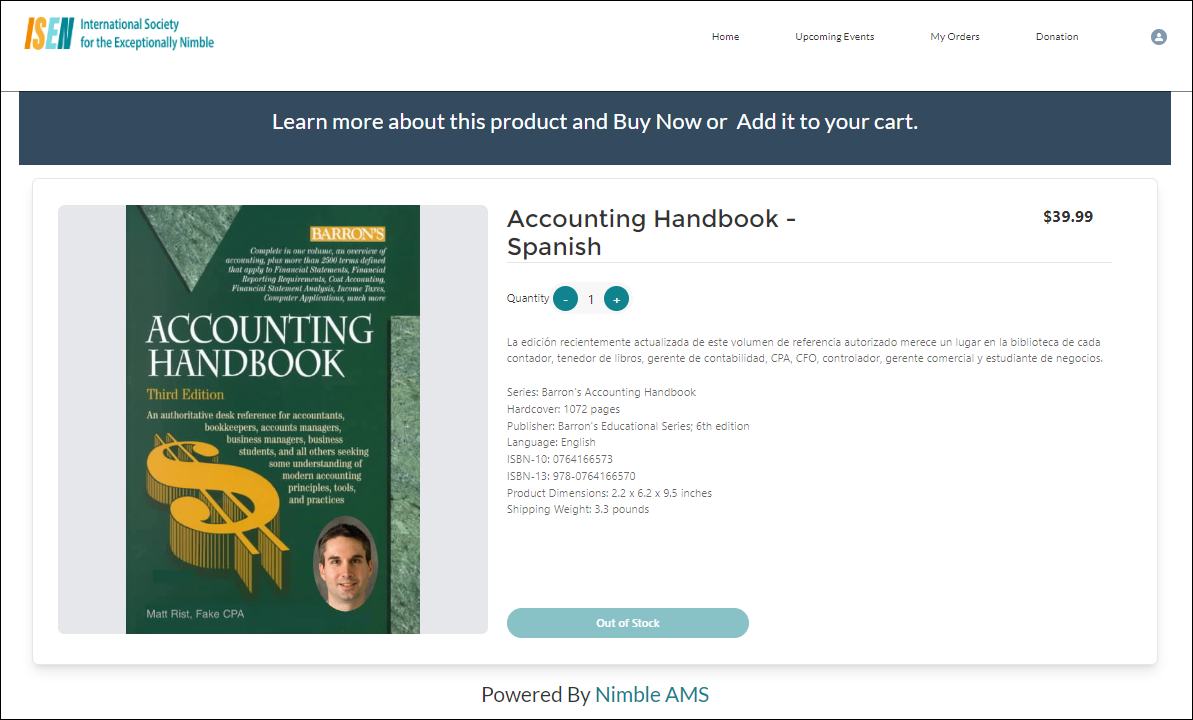
Out of Stock
-
If you have no inventory left for a product, then members will see an 'Out of Stock' label on the button (as shown in Figure 2).
-
Sometimes, the 'Out of Stock' button is displayed because the chosen quantity for the product exceeds the available stock. At this point, reducing the quantity will let the members proceed with their purchase.
-
Inventory Threshold Alert
-
If a product inventory is being tracked and the
Inventory On Handlevel falls below theInventory Warning Thresholdlevel, a message should be displayed indicating the remaining number of items, which match the currentInventory On Handcount. (Refer)For instance, if a staff member sets the
Inventory Warning Thresholdat 5 and theInventory on Handcount drops to 4, and the message "Hurry, only 4 left in stock" will be displayed (as shown in Figure 3).

Taxable products
Tax will be applied to a merchandise product, which is taxable, based on the shipping address that the member enters. After they finish entering their shipping address click on Save, the tax will be calculated and added to the total purchase amount. After the member clicks on Pay, then the orders that are generated on the backend will also show the tax information on the transaction records.
Shipping Methods
If the product can be shipped then they will be able to provide their shipping address. Shipping Options will be available to select based on their shipping address and the product they're purchasing. Once they select a Shipping method, then shipping charges will be calculated and included in the order. For more details regarding how shipping charges are calculated, visit the page about (WIN25) Ship Methods.
Members will not be able to proceed with the order until they provide a shipping address and select a shipping method for the shippable product.
Purchase a Merchandise Product through Buy Now
The Buy Now button will take them straight to checkout where they can view their order details and pay through a new Credit Card or one of their stored payments to purchase the product.
-
To purchase a merchandise product simply click the Buy Now button (shown in Figure 1). Once you do this, then a Checkout Page (shown in Figure 4) will appear displaying the order summary.
-
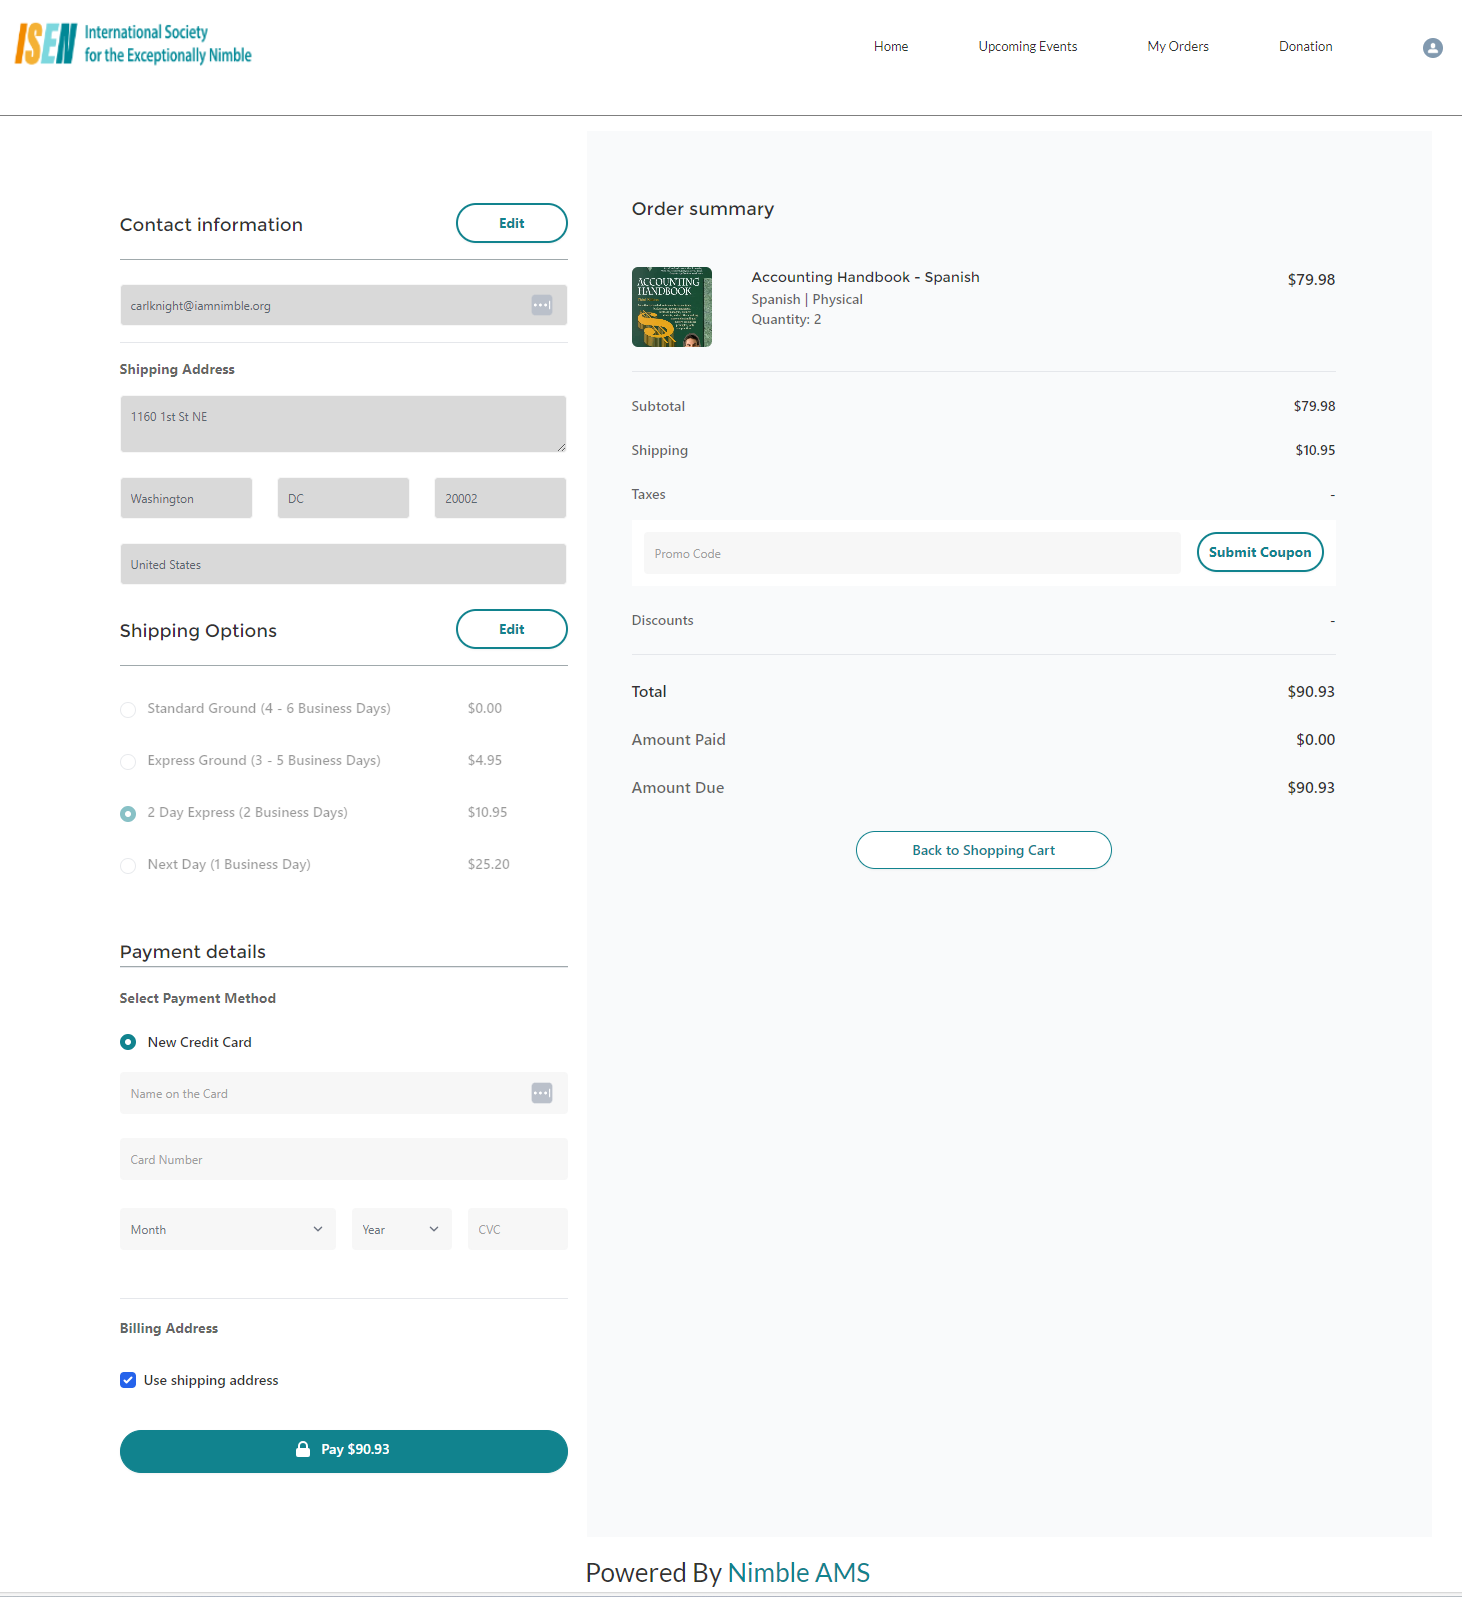
Under the Contact Information and Shipping Address section, edit or leave existing information and select Shipping Options.
-
Click ‘Save’.
-
Under the Payment Details section, provide the required information.
-
Next, click on 'Pay'.
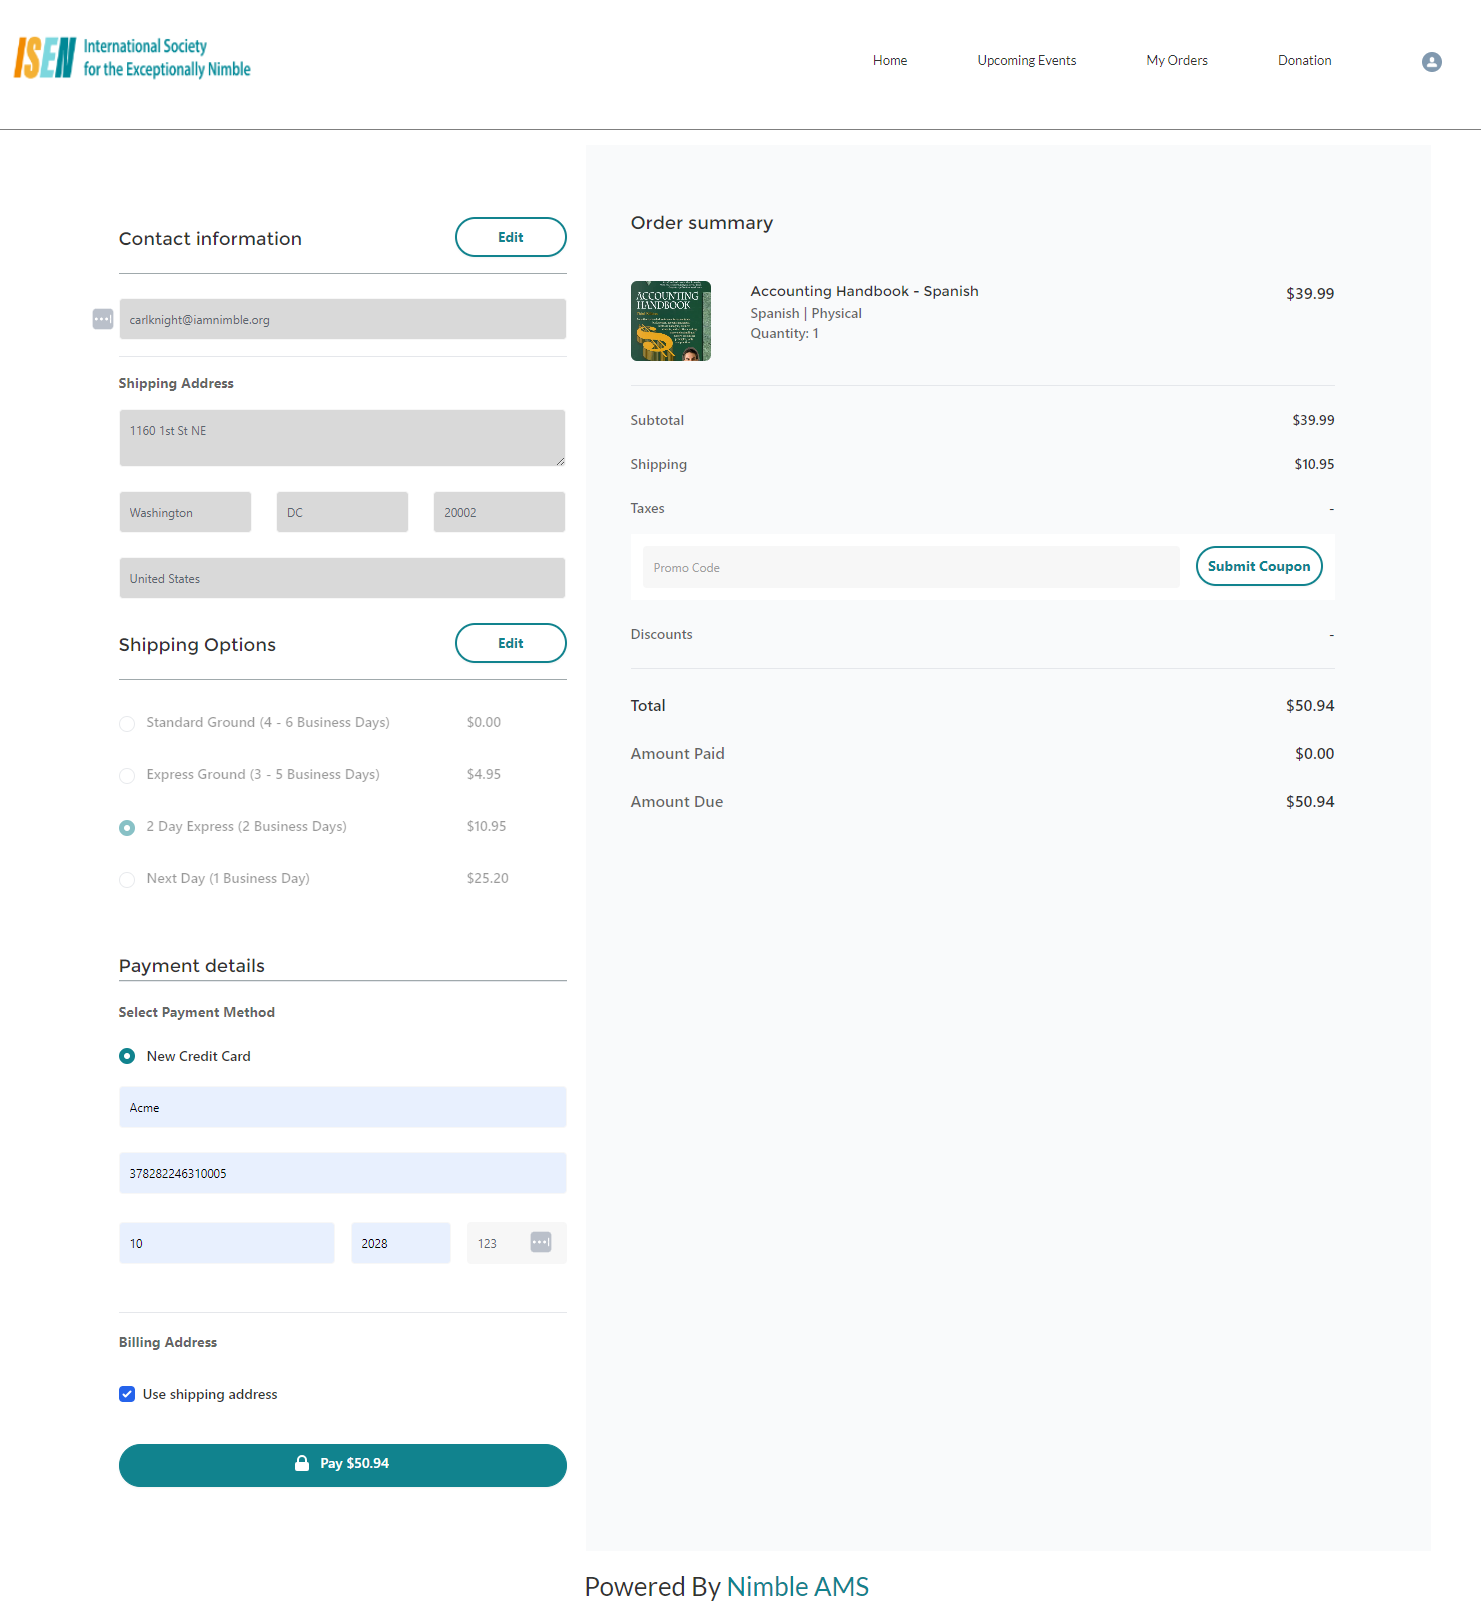
Constituents must click ‘Save’ to proceed to Pay. Once contact information is saved, the ‘Pay’ button will be highlighted.
-
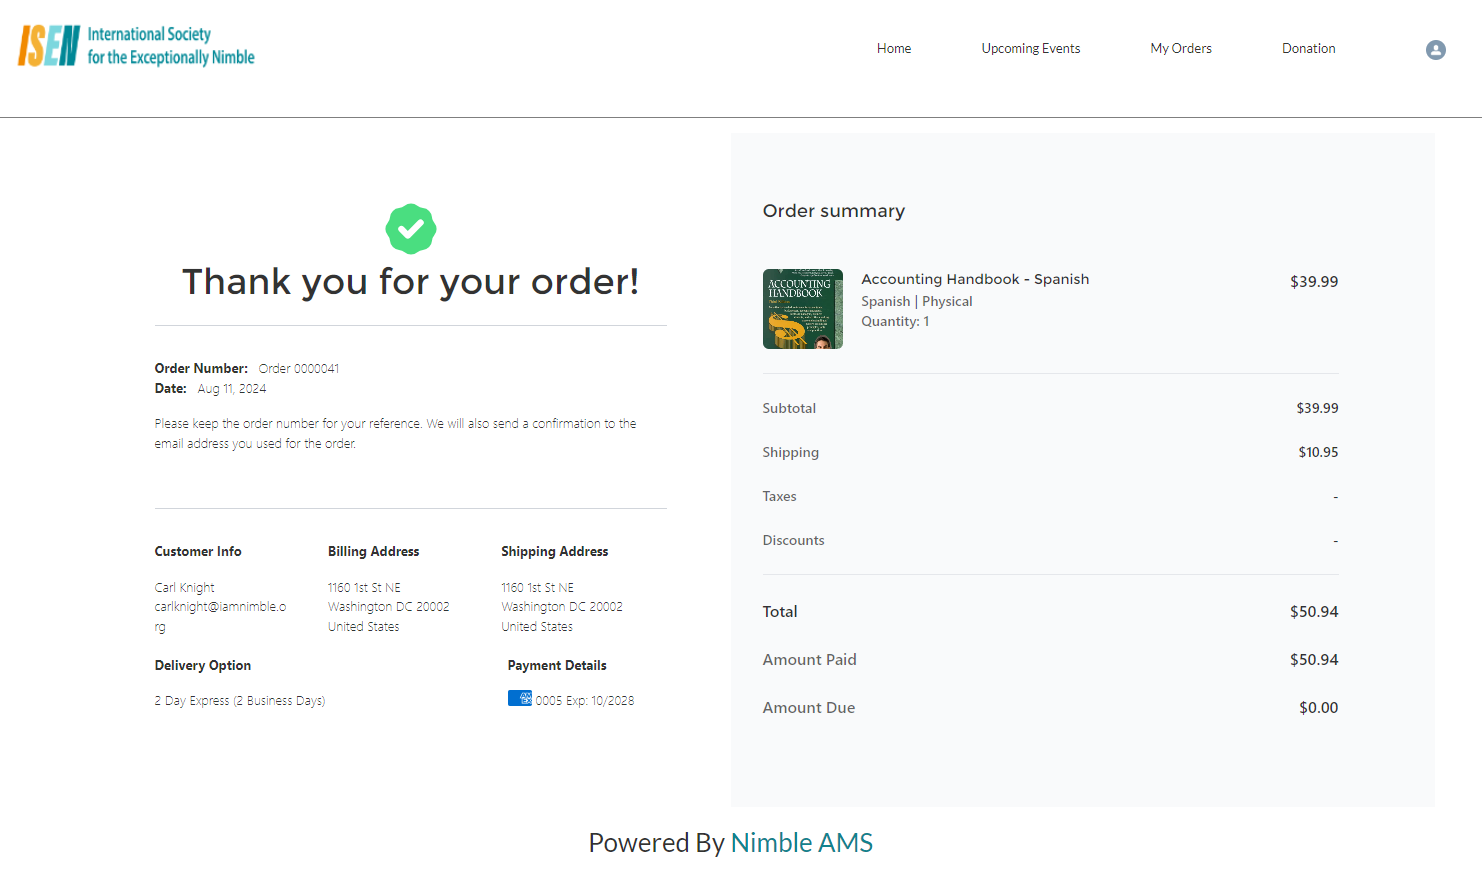
Once they've paid for the product, then the 'Payment Confirmation' page will display that will show a summary of the product they purchased and their payment method.
Purchase a Merchandise Product through Add to Cart
-
To purchase a merchandise product simply click the Add to Cart button located on the right side of the Product Page (shown in Figure 1). Once you do this, then the ‘Add to Cart’ button will change to ‘Added to Cart’ (shown in Figure 6).
-
Click on the Cart icon and navigate to the Shopping Cart page, where you can view the merchandise product and other items in your cart. (shown in Figure 7)
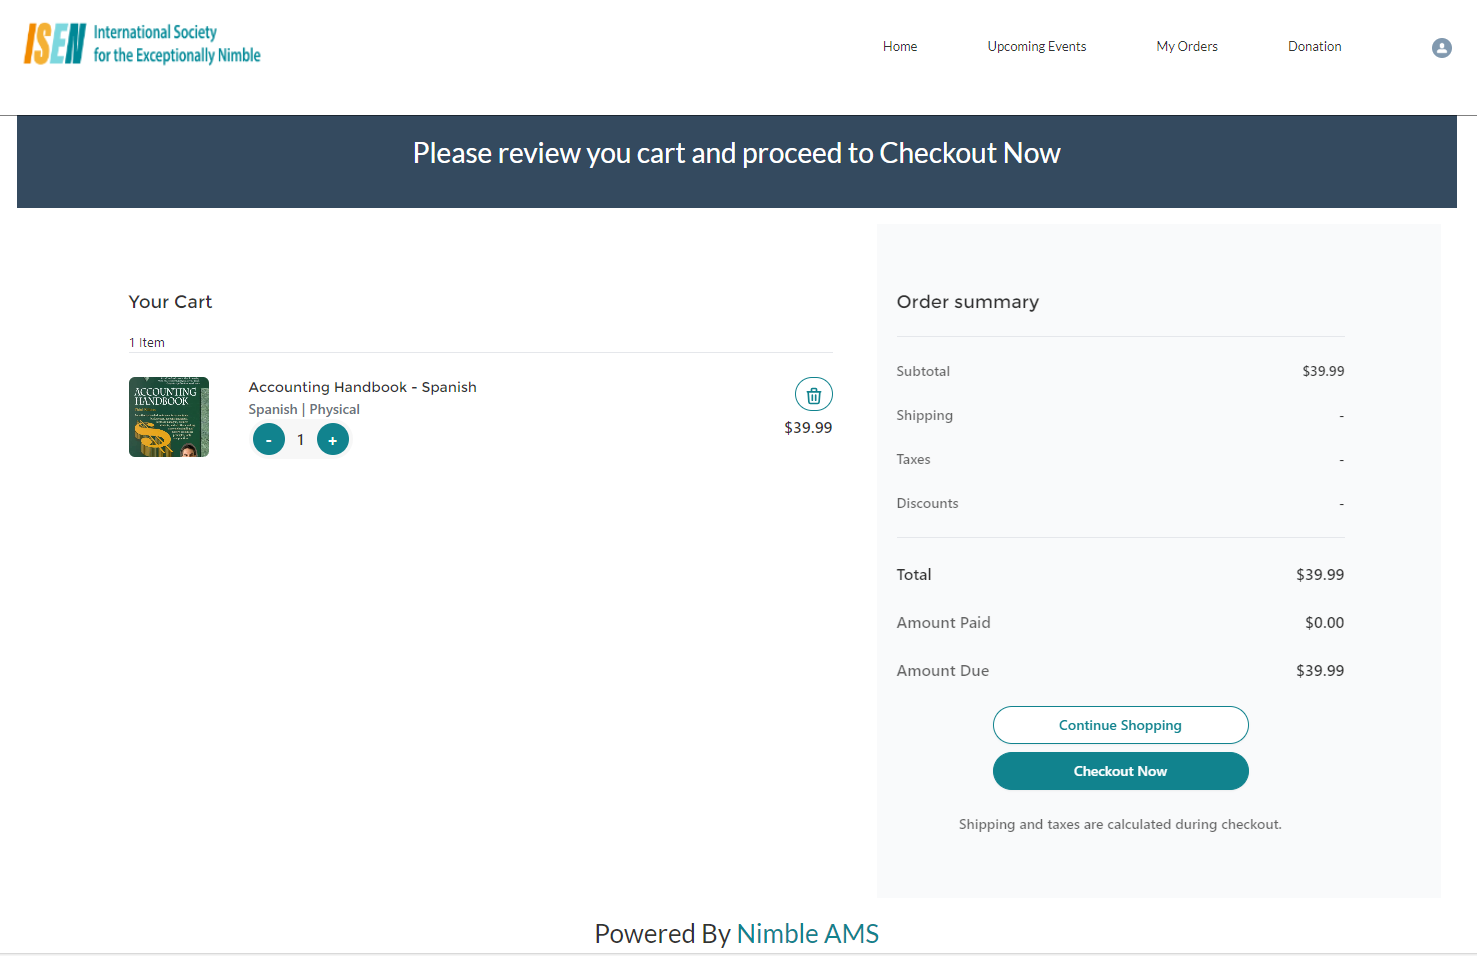
Figure 7. Shopping Cart Page that shows an item and prices of products and the option to Continue Shopping and Checkout Now.
-
Click 'Continue Shopping' to return to browsing or adding more items to the cart without disrupting the current purchase process (shown in Figure 7).
-
Click ‘Checkout Now’ to complete the purchase (shown in Figure 7).
-
Under the Contact Information and shipping information section, make edits if necessary and click ‘Save’ (shown in Figure 8).
-
Under the Payment Details section, provide the required information (shown in Figure 8).
-
Next, click on 'Pay' (shown in Figure 8).
If the user needs to adjust the quantity or remove the product, they have the option to go back to the shopping cart by using the Back to Shopping Cart button. See Figure 6.
-
You will see an 'Order Confirmation' message (shown in Figure 9) and an order summary will be displayed.
Constituents must click ‘Save’ to proceed to Pay. Once contact information is saved, the ‘Pay’ button will be highlighted.
If the order total amounts to zero, the payment information section will be automatically hidden and a Submit button will be shown.
When a non-member adds a membership product to the cart, member pricing can be applied to other non-membership products in the same checkout. If the membership product is removed, pricing for other products reverts to non-member rates. This functionality is a standard bulk pricing manager.
We have enhanced the custom bulk pricing manager, and associations can benefit from the improvements by implementing the enhanced context fields.
Unknown Attachment
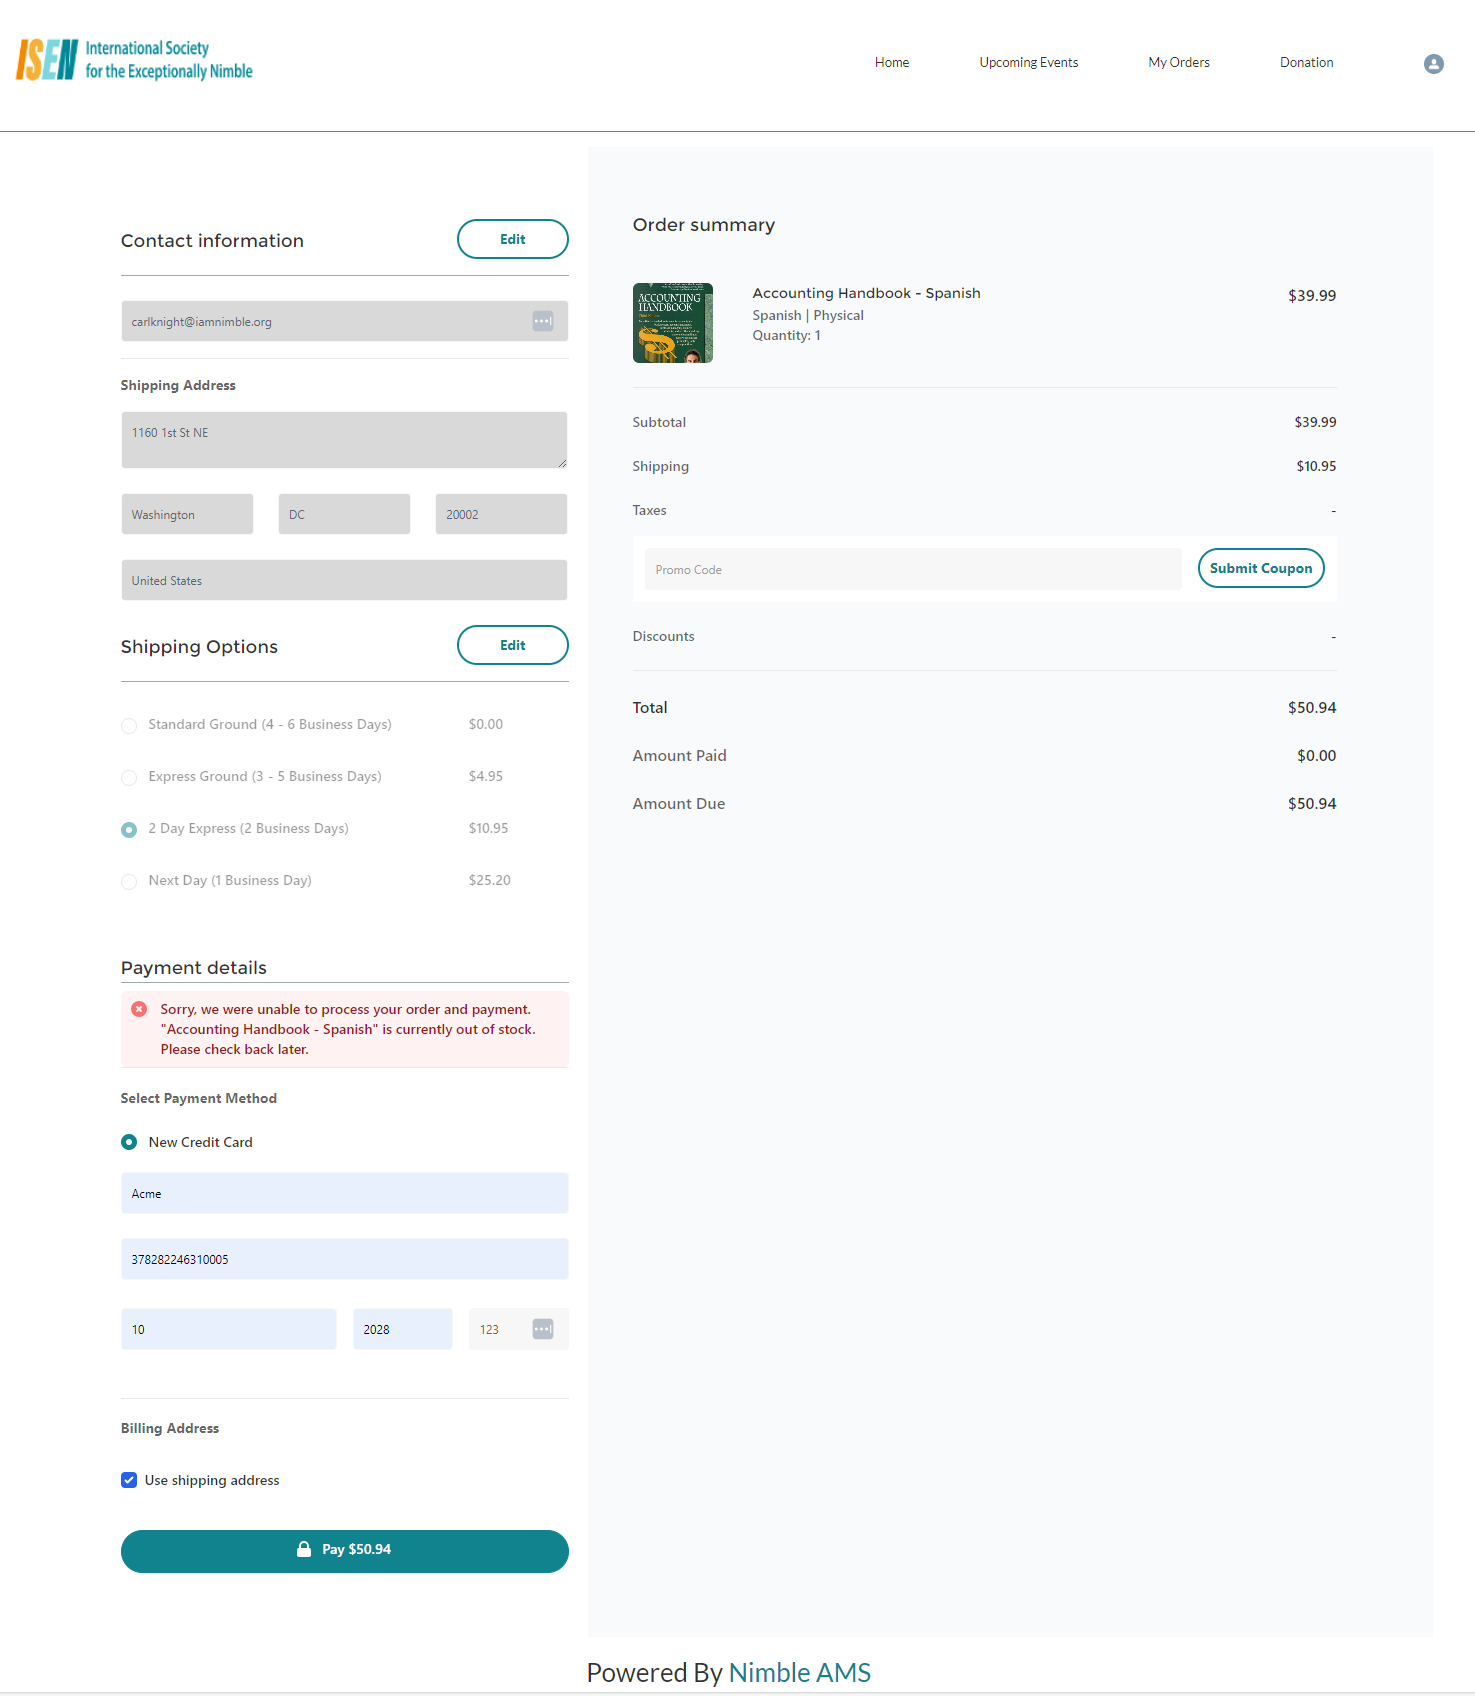
What to Expect if a Product Goes Out of Stock While Checking Out
If the inventory happens to go out of stock while the member is in the process of checking out, then they will see a message that reads, "Sorry, we were unable to process your order and payment. “<Product name>” is currently out of stock. Please check back later" (as shown in figure 9). This will prevent them from being able to proceed and their method of payment will not be charged.
Applying Coupon during checkout
Members and constituents can maximize their savings by applying a coupon code at the time of checkout through an easy process. Please see (WIN25) Applying a Coupon in Experience Cloud Checkout for detailed instructions and important information concerning coupon application.
Guest checkout
Members and constituents can easily purchase a product without having to log in. Please see (WIN25) Guest Checkout in Experience Cloud for detailed instructions on the guest checkout process.
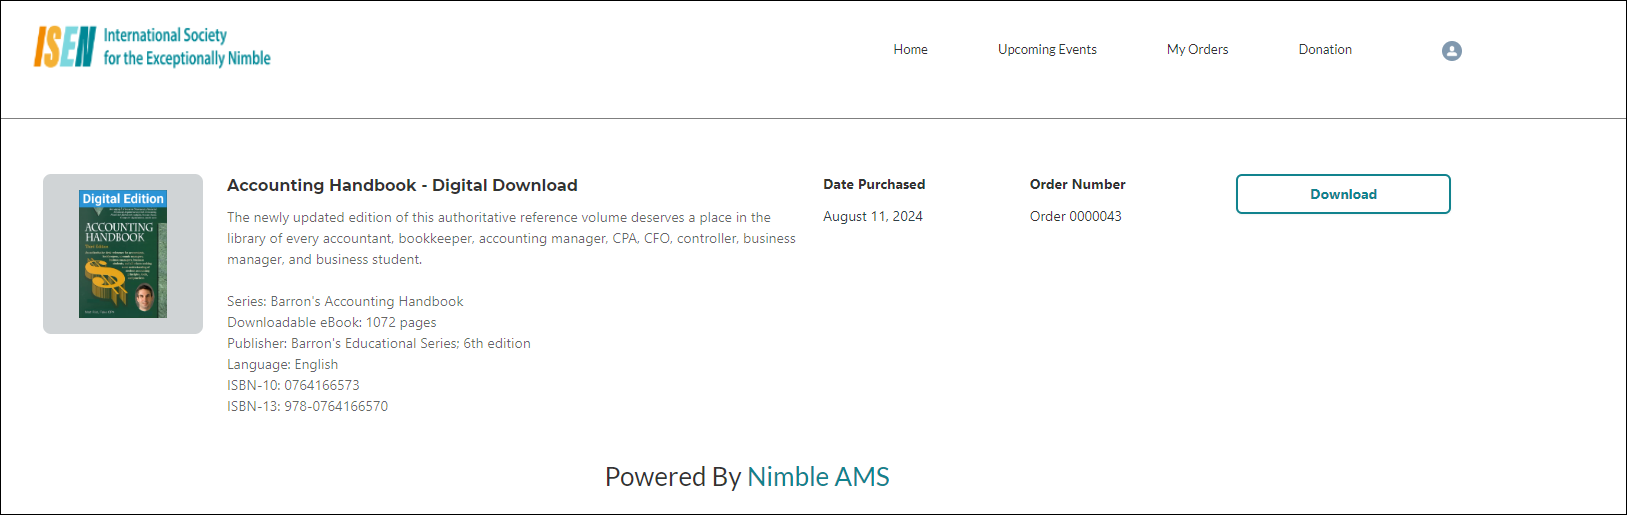
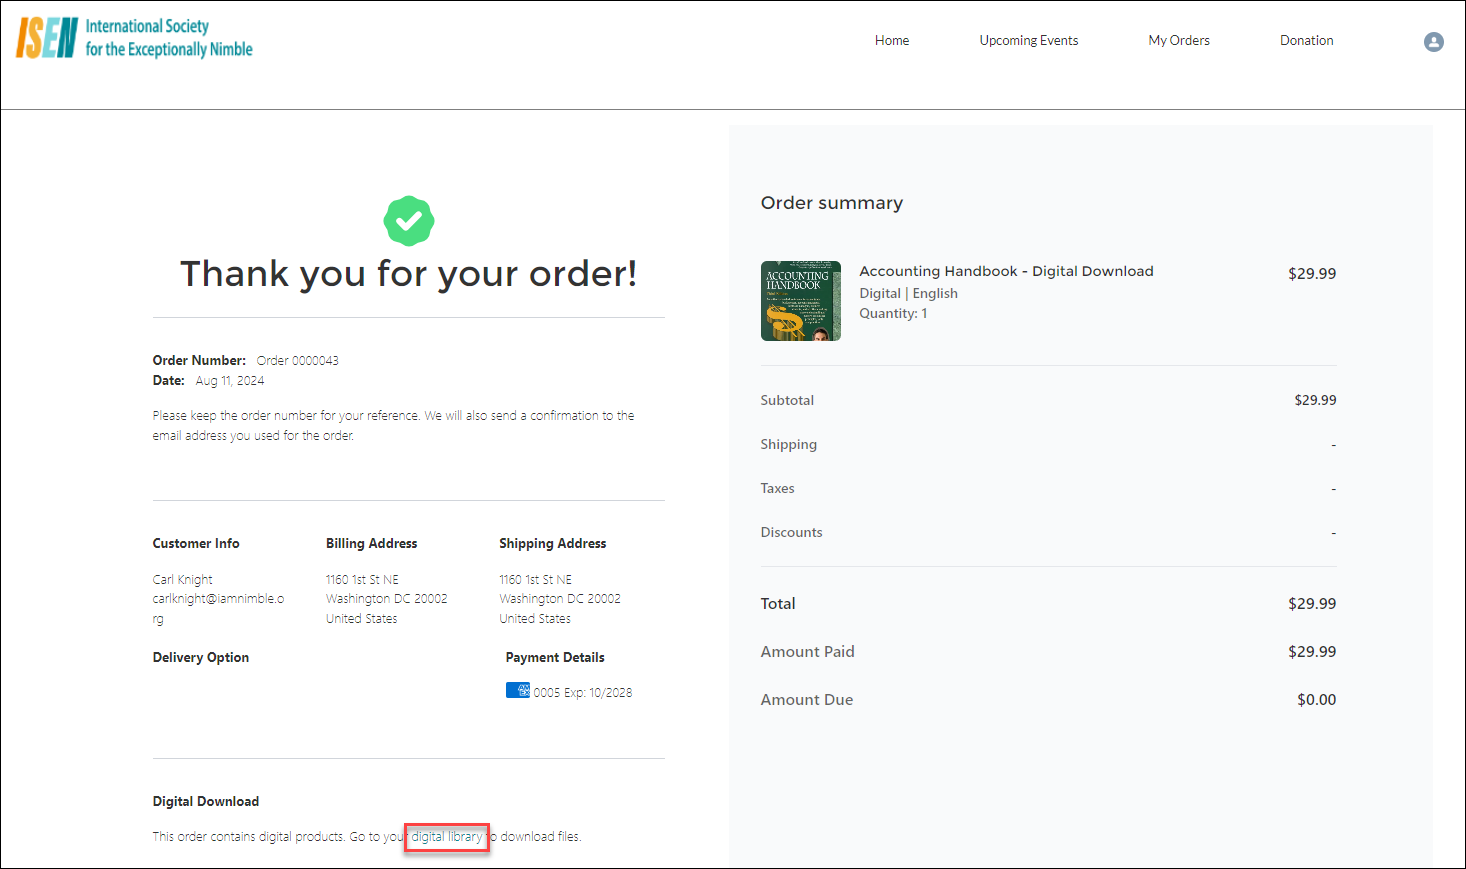
Downloadable products
Member Portal allows a constituent to purchase a downloadable product and then download it through an easy-to-use product downloads page. Purchasing a downloadable product is similar to any merchandise product. On the Payment confirmation page, if the order contains a downloadable product, a link is provided to go to the Digital Library page to download the content. See Figure 11.
The 'Download' page (Figure 12.) will display all of the downloadable products that you have purchased along with the product name, product description, purchase date, and order number. This page can only be accessed when the user is logged in.