
This page describes enabling and configuring Google Pay in Nimble AMS. It provides an easy step-by-step process for the Association staff to enable Google Pay on the Community Hub and Member Portal.
Prerequisites:
-
You must be using the Nimble AMS Cardpointe payment gateway.
-
You must enable My Checkout and My Invoice Experience.
Enablement
Turn on Google Pay Custom Metadata Type:
-
From Setup, enter
Custom Metadata Typesin the Quick Find box, then select Custom Metadata Types. -
Click Manage Records next to the Tag of Nimble AMS.
-
Click Edit next to GooglePay.
-
Select Is Active.
-
Click Save.
Configure Google Pay in Nimble AMS
Step 1: Link the Payment Method to the Financial Entity.
-
From the above-created Google Pay Payment Method detail screen, Click New on the Entity Payment Methods.
-
Enter the below information:
-
Payment Method: Auto-populates.
-
Entity: Seach and add the appropriate financial Entity
-
Bank Account: Search and add the appropriate Bank Account
-
-
Click Save.
Alternatively, you can follow this document to set up the Entity Payment Method.
Step 2: Create a Credit Card Issuer and Link to the Financial Entity.
This step is similar to all the Payment Methods irrespective of Google Pay. Follow the below documents to create the Credit Card Issuer and Link it to the Financial Entity that is linked to the Google Payment Method.
Step 3: Configure Additional Settings for Google Pay.
Configure and Verify Additional Settings for:
-
DigitalWalletMerchantName - The value entered on this record is displayed on the Google Payment Sheet and the members can view it while making payments.
Show Me How Its Done
-
From Setup, enter
Custom Metadata Typesin the Quick Find box, then select Custom Metadata Types. -
Click Manage Records next to the Additional Setting of Namz.
-
Click Edit next to DigitalWalletMerchantName.
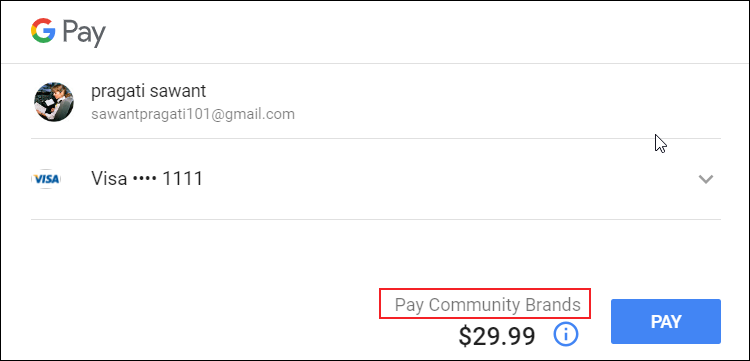
DigitalWalletMerchantName- The Value field displays the default value "Example Merchant." Users can add a custom name in the Value field that appears on the Google Pay pop-up window. Typically, you should enter your Association’s name or the Abbreviation of your Association’s name in this field.
As an example: If you enter “Community Brands” in the Value field, then Google Payment Sheet displays “Pay Community Brands” label. You can find the image below.
-
Click Save.
-
GooglePayMerchantID - Users do not need to manually configure the Google Merchant ID. It is already set as the default value.
Step 4: Display the Google Pay Icon on the Checkout
Google allows us to brand their payment method using their traditional branding icon that helps your members to recognize widely used Google Pay as a payment option. This also helps your members to find the Google payment option with ease on the checkout pages.
Use Google Pay Icon on Visualforce Community Hub (Recommended):
Below steps are for the My Checkout page of the Visualforce CH:
-
In the tab bar, click on the App launcher icon, or in Salesforce Classic, click +, All Tabs, and search for Pages.
-
Click Pages.
-
Under the Page to Configure dropdown, choose My Checkout
-
Add Payment Options With Icons Card in the Cards on the My Checkout Page section.
Follow similar steps for other checkout pages such as Express Pay for Carts, and My Invoice.
For Donate now and Express Pay for Orders checkout pages:
-
Add Order Payment Option Selection 2 card in the Cards on the My Checkout Page section.
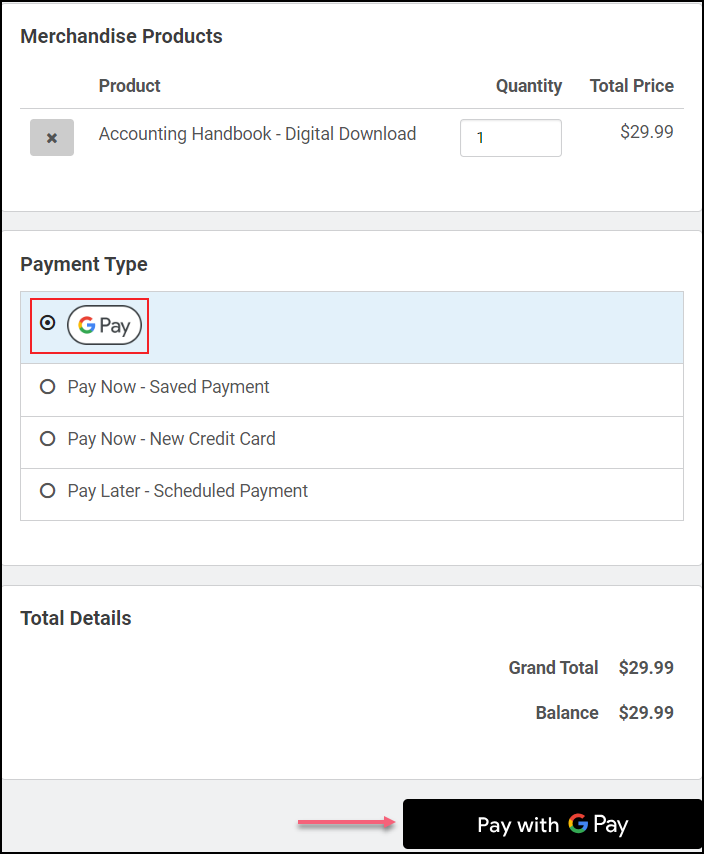
The below image displays the Google Pay payment icon on the checkout page:
Use Pay Now - Google Pay text on Visualforce Community Hub:
Alternatively, if your association does not want to use the Google Pay icon, they can still use the plain text to display the Google Payment Method on the checkout pages.
Below steps are for the My Checkout page of the Visualforce CH:
-
In the tab bar, click on the App launcher icon, or in Salesforce Classic, click +, All Tabs, and search for Pages.
-
Click Pages.
-
Under the Page to Configure dropdown, choose My Checkout
-
Add Payment Options Card in the Cards on the My Checkout Page section
Follow similar steps for other checkout pages such as Express Pay for Carts, and My Invoice.
For Donate now and Express Pay for Orders checkout pages:
-
Add Order Payment Option Selection card in the Cards on the My Checkout Page section.
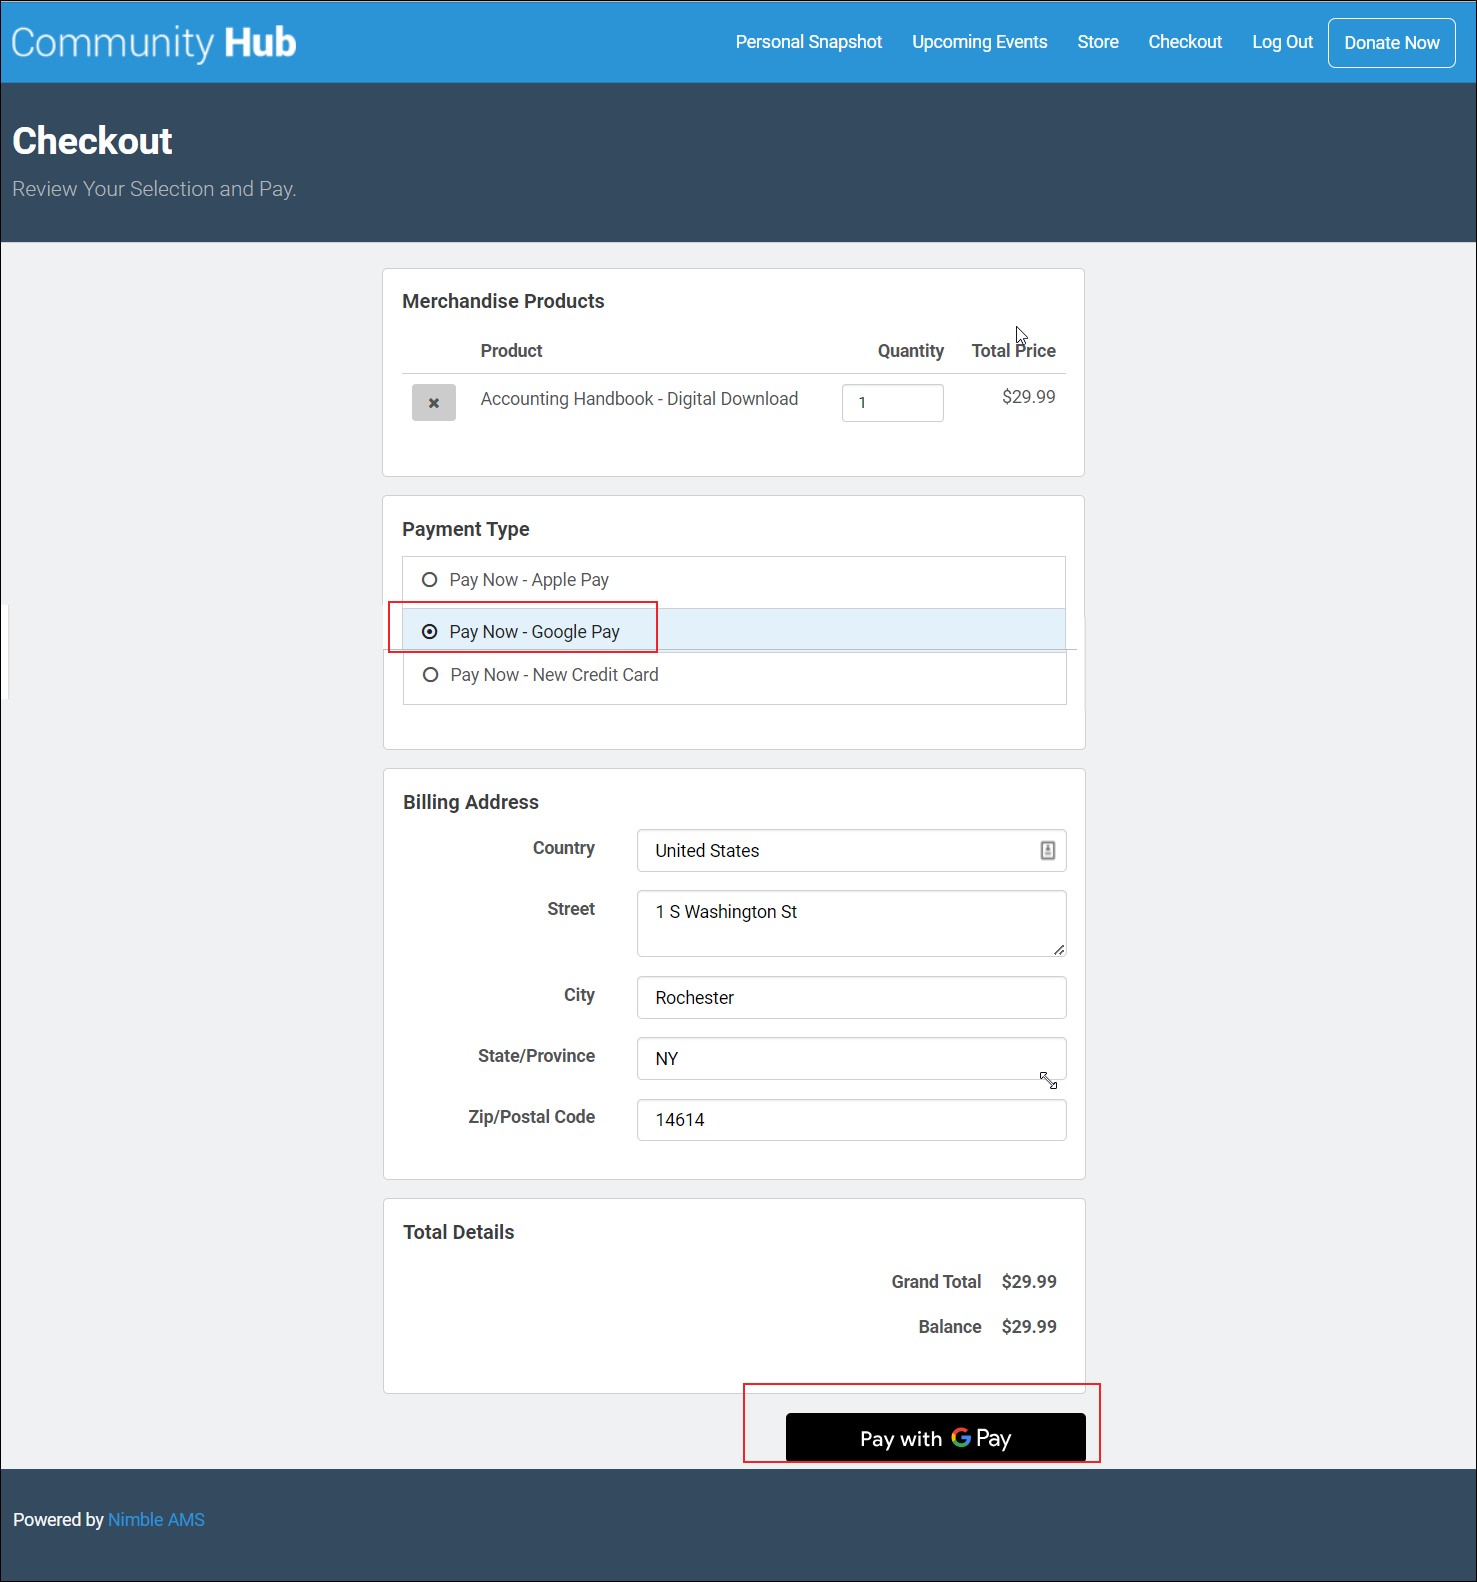
The below image displays the Pay Now - Google Pay text on the checkout page:
Use the Google Pay Icon on the Member Portal Checkout page:
You can skip this step if you are not using the new Member Portal Checkout. These steps only apply to the Associations that are using the Nimble AMS Member Portal Checkout page on their community hub.
Please note that on the Member Portal Checkout page, by-default we provide payment options as an icon, offering a simplified payment process. This differs from VF checkout, which provides the choice between icons and text.
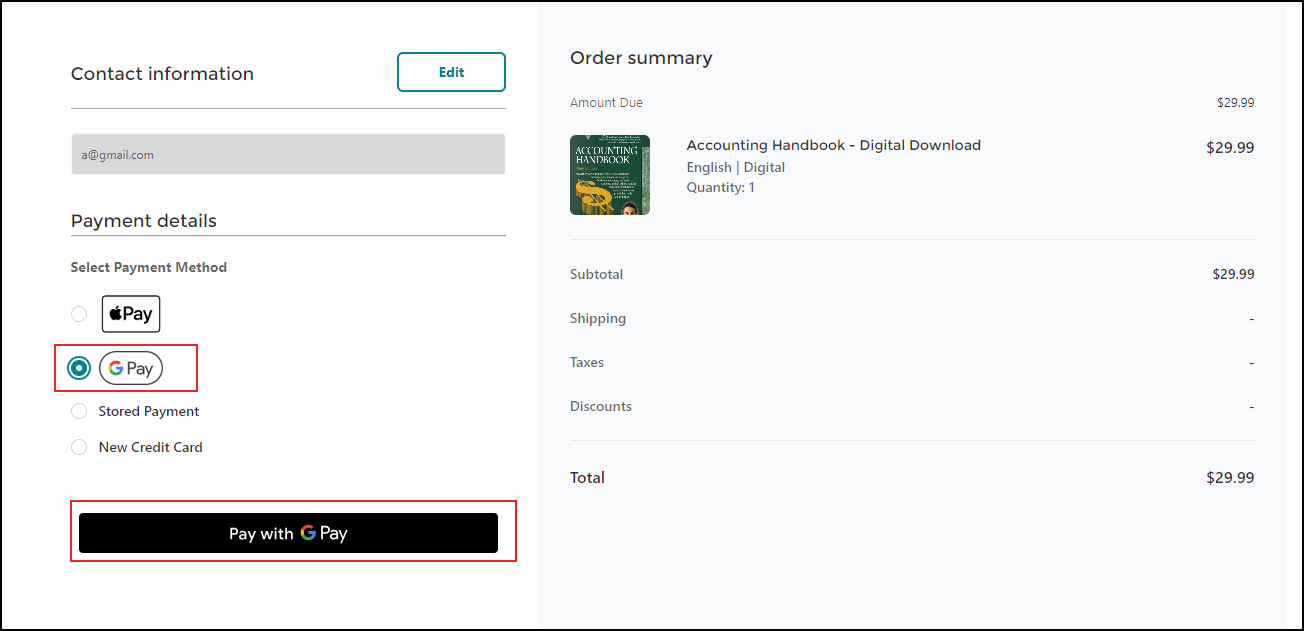
Google Pay are accessible for both logged-in and guest users. The checkout pages supported for the logged-in users are:
-
MyCheckout
-
Donate Now
-
Express Pay for Carts
-
Express Pay for Orders
-
My Invoice
-
Member Portal Checkout
The checkout pages supported for the guest users are:
-
Donate Now
-
Express Pay for Carts
-
Express Pay for Orders
Limitations:
-
Google Pay is not displayed when the members try to pay for a recurring product. We hide it by default and members can pay using other payment methods such as Credit Card or ACH.
-
Google Pay is not displayed when the members try to schedule an order. We hide it by default and members can pay using other payment methods such as Credit Card or ACH.
-
Google Pay is supported only for the Web. On Touch devices capability is not supported.